Silicone molds are popular tools for crafting, baking, and resin projects. They last for ages and retain their quality even after continuous use. However, if you want them to last longer and produce better results, you have to clean them.
This guide will show you exactly how to clean silicone molds properly. This way, you can better maintain their quality and extend their lifespan.
Why Does Proper Cleaning Matter?
First, cleaning silicone molds creates better finished products. When your molds are dirty, they can leave marks or residue on your creations. Clean molds also ensure that silicone mold release agents can work more effectively. Residues can interfere with proper coating, reducing the efficiency of your release agent. Knowing how to wash silicone molds also prevents fungal buildup that can damage your projects. In addition, regular maintenance keeps your mold flexible and easy to use.
Dirty molds also affect the release of your finished items. Having leftover materials in your mold can cause problems with sticking. So, learning the best way to clean silicone molds will save you time and frustration in the long run.
Step-by-Step Basic Cleaning Method
Basic Cleaning Supplies You’ll Need
Before you start cleaning, gather these simple supplies.
First, you’ll need warm water and mild dish soap.
Next, get a soft brush or an old toothbrush for scrubbing.
After that, have some paper towels or a clean cloth ready for drying.
For tougher cleaning jobs, you might also need white vinegar or baking soda.
Rubbing alcohol can also help remove stubborn residue.
Finally, keep some cotton swabs handy for cleaning small details in your molds.
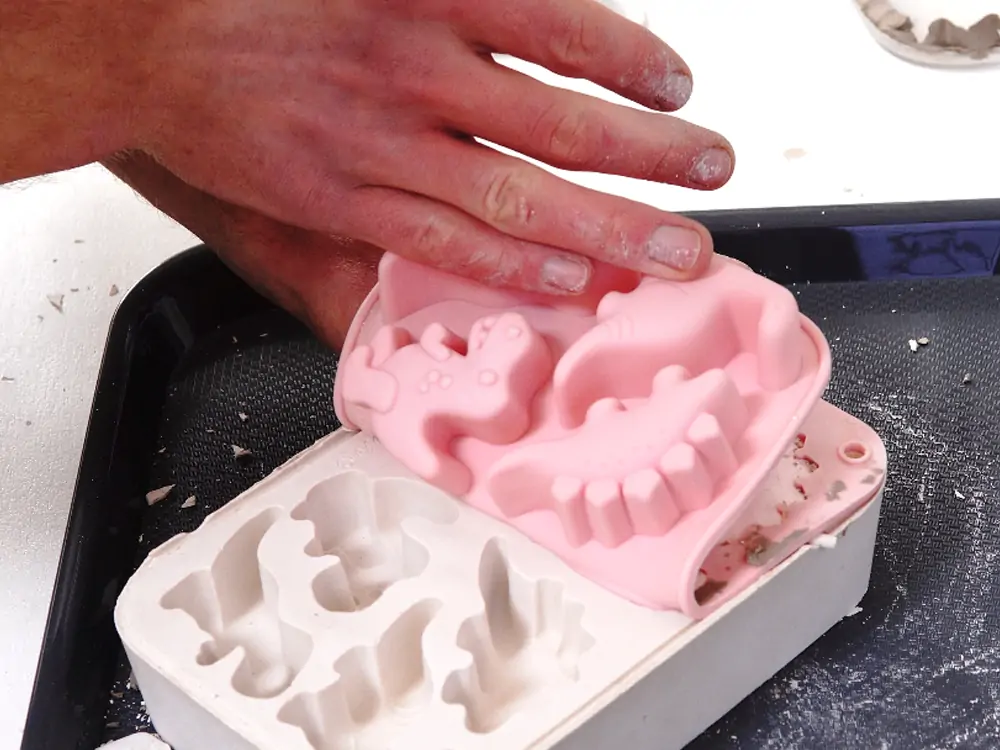
Step 1: Remove All Materials
Start by removing any leftover materials from your mold completely. Then, check all the corners and details for stuck pieces. You need to rid your mold of every piece of material. For the stubborn bits, use a soft brush to gently remove them.
Step 2: Rinse with Warm Water
Next, rinse the mold thoroughly with warm water. This initial rinse removes loose debris and makes cleaning easier. Moreover, warm water helps soften any remaining materials that might be stuck.
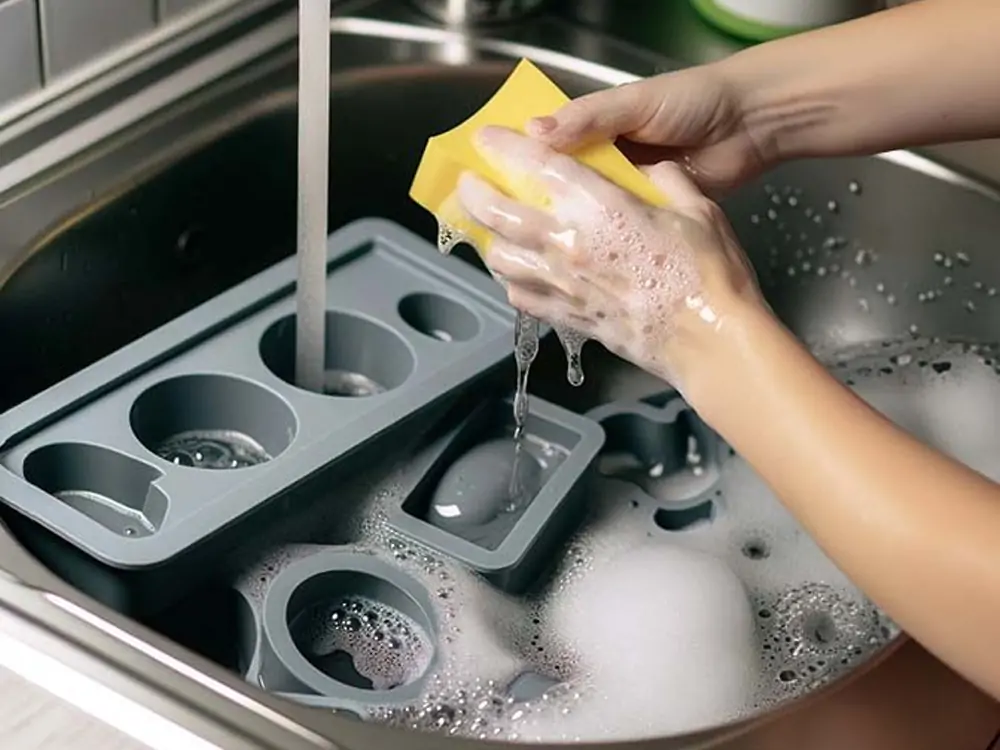
Step 3: Apply Soap and Scrub
After rinsing, apply a small amount of mild dish soap to the mold. Then, use your soft brush to gently scrub all surfaces. Pay special attention to detailed areas where materials might be hidden.
Work the soap into all the crevices and corners, and use circular motions to remove any stubborn residue.
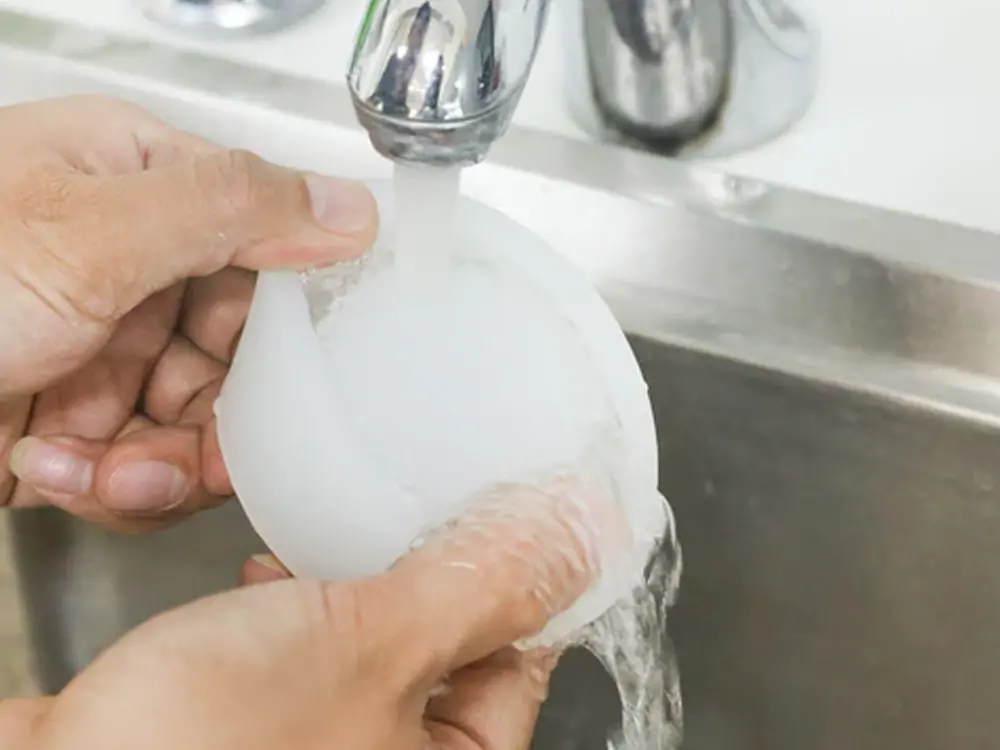
Step 4: Rinse Again
Once you’ve scrubbed thoroughly, rinse the mold again with warm water. Make sure to remove all soap residue completely and check that no soap bubbles remain in the patterned areas.
Step 5: Dry Completely
Finally, dry the mold completely before storing it. You can shake off excess water, then use a clean towel to pat the mold dry. After that, let it air dry for a few minutes to ensure no moisture remains. Now, you understand the basics of how to clean silicone molds.
How to Clean Silicone Resin Molds?
Resin molds need special attention due to the material’s adhesive properties.
Remove the resin pieces immediately after curing to prevent permanent bonding. After, check for any resin spillage or leakage around the mold edges.
For uncured resin, use rubbing alcohol with protective gloves in a well-ventilated area. You’ll need to work quickly because uncured resin is easier to remove than hardened material.
When the resin has hardened on your mold, soak it in warm, soapy water for 15-20 minutes. Use a soft brush to work away the residue and a plastic scraper for stubborn spots. Be careful not to damage the silicon.
Tackling Stubborn Stains and Residue
Sometimes standard cleaning isn’t sufficient for tough stains. Try these stronger methods when gentle cleaning fails.
Baking Soda Treatment
Create a paste using baking soda and water. Next, apply the mixture to the stained areas and let it sit for 15 minutes. This mild abrasive action helps to lift embedded stains without damaging the silicone. Now, proceed to scrub gently with a brush before rinsing.
Vinegar Solution
Mix equal parts of white vinegar and water for an effective cleaning solution. Soak the mold for 30 minutes, then scrub with a soft brush. The acid in vinegar helps break down mineral deposits and organic residues.
Alcohol Treatment
Rubbing alcohol works well for oily residues. Apply it with a cloth or cotton swab while focusing only on the affected areas. Then, wipe the alcohol off with a dry cloth. This method is very helpful in removing fingerprints and oils.
How to Stop Silicone from Being Sticky?
Sticky silicone molds are frustrating to use and can ruin your projects. We understand how disastrous that can be and have thus created this section to help you understand the causes and also provide solutions.
Common Causes
- Soap residue left after washing creates sticky surfaces because the film doesn’t fully rinse away. This residue attracts dust and debris, making the problem worse over time.
- Using harsh detergents or chemicals can break down the silicone’s surface by removing the protective coat or altering the polymer structure.
- Exposure to oils from your hands, cooking ingredients, or craft materials penetrates the silicone surface. Certain plastics, especially those containing plasticisers, can enter into silicone and create permanent stickiness.
- Extreme temperatures can also cause stickiness. High heat can partially cure your additives and create tacky surfaces. Cold temperatures make silicone temporarily sticky until it returns to room temperature.
- Other causes of stickiness are age and UV exposure. Poor-quality silicone molds are more susceptible to these problems than higher-grade materials.
Prevention Strategies
- Always rinse your mold thoroughly after washing to remove all the soap residue. Use only mild detergents designed for silicone or food-safe applications.
- Store your molds in cool, dry locations and away from direct sunlight and chemicals.
- Always handle your molds with clean hands to avoid transferring oils. Keep them separate from other materials that might leak oils onto the surface.
- Restoring Sticky molds
- For molds that have become sticky, wash them with dish soap and warm water, then rinse extensively. Try the baking soda paste method for more severe cases.
- Soak extremely sticky molds in a vinegar solution overnight, then scrub gently and rinse thoroughly. Some people find that dusting their molds with cornstarch also reduces stickiness.
Common Troubleshooting Issues
Odor Problems
Strong-smelling materials like resins, soaps, or food ingredients can leave persistent odors. This is due to the porous nature of silicone, which traps odors within.
Start by washing your mold with a baking soda solution. Let it soak for several hours or overnight for severe odors. The baking soda neutralises and absorbs acidic odors and smells.
For stubborn odors, try a coffee ground method. Fill your mold with used coffee grounds and let it sit for 24 hours. Coffee naturally absorbs odors and can eliminate even strong chemical smells. Rinse thoroughly after treatment.
You can also place activated charcoal packets with your molds to combat the smells. Replace the charcoal every few months for continued effectiveness.
If the odors persist after multiple treatments, you need to reconsider whether the mold is worth keeping. Some chemical odors may be a result of material degradation that affects the mold’s safety and performance.
Discoloration
Some materials cause permanent staining, ranging from minor yellowing to deep colour changes. Food colouring, certain dyes, turmeric, and some metal-based materials are common culprits.
While discolouration doesn’t affect function, it can be unsightly and may transfer to light-colored projects.
Use the vinegar or baking soda methods to minimise fresh discoloration.
Hydrogen peroxide can also lighten some stains. Soak the mold in a hydrogen peroxide solution for several hours, then rinse thoroughly. Never use bleach, as it can damage silicone and create toxic fumes.
It is important to accept that some staining is normal with heavy use. To preserve your clear molds for detailed work, divide them into groups and dedicate some to materials that cause staining.
Warping and Shape Distortion
Improper storage or exposure to heat can cause molds to warp or lose their original shape. Prevention is key since, most times, warping cannot be reversed.
If slight warping occurs, try placing the mold on a flat surface with light weights on the warped areas. Leave it in a warm (not hot) location for several hours. Some flexible molds may return to their original shape with this treatment.
If the warping is severe, that’s your sign to get new molds. Warped molds produce distorted results and may not seal properly during use.
Surface Texture Changes
Over time, your molds may develop rough spots, become cloudy, or lose their smooth finish. This often results from using abrasive cleaners, exposure to chemicals, or natural ageing of the silicone material.
You can restore cloudy molds by polishing them with a small amount of mineral oil on a soft cloth. Work in circular motions and remove all the excess oil before use. This technique is most effective for minor cloudiness.
For rough textures, very fine sandpaper can smooth minor imperfections. Work gently and test on an inconspicuous area first. This method should be a last resort before replacement.
When to Replace Your Molds
Even well-maintained molds eventually need replacement. There’s no point in knowing how to clean silicone molds if cleaning them becomes increasingly difficult or time-consuming. At that point, getting a replacement may be more cost-effective.
Watch for:
- Permanent tears, even small ones, as they will worsen with use and allow materials to leak.
- Excessive staining that affects the mold’s clarity or transfers to your projects.
- Loss of flexibility.
- Molds that no longer release items easily should be retired, even if they look fine.
- Poor detail reproduction (when the details of your projects become muddy or unclear).