
The use of elastomers began hundreds of years ago. In 1839, a breakthrough happened, and through vulcanization, rubber took various forms. Even today, these processes are used to create various types of rubber. However, to give them a specific shape, rubber injection molding plays a very critical role.
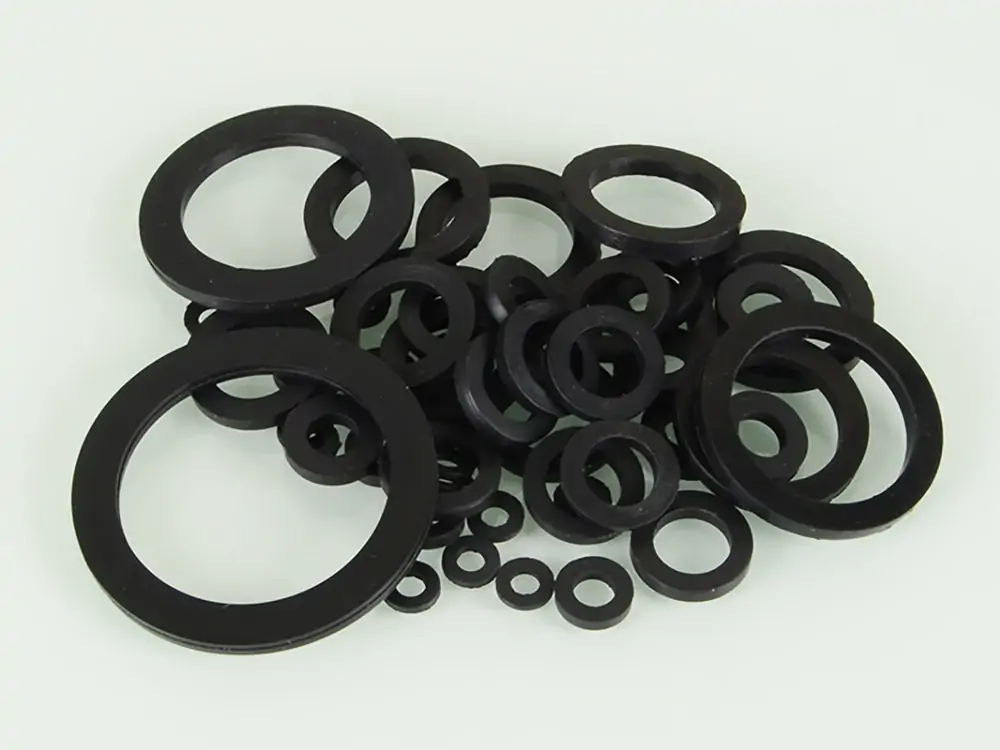
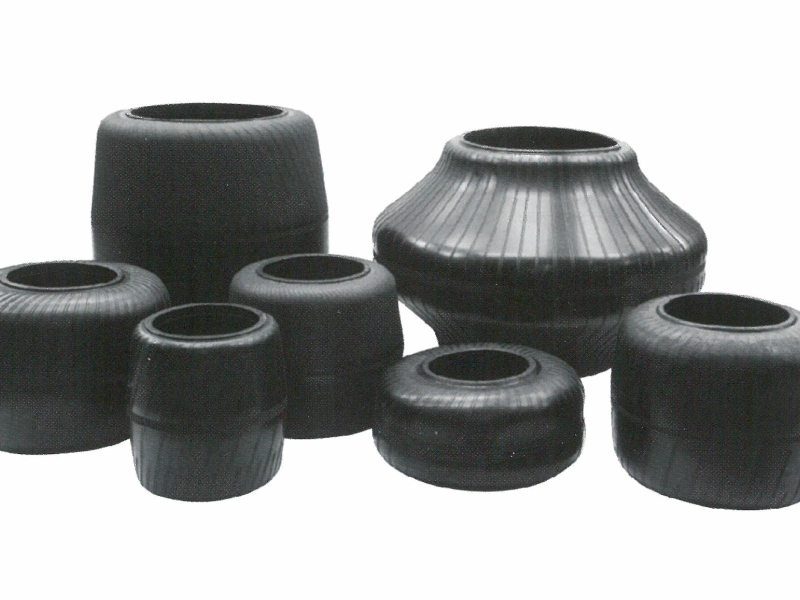
Rubber injection molding is used to create a wide range of rubber products. Smaller items may include seals, gaskets, O-rings, bushings, keypads, and so on. Larger items may include auto tires, industrial rollers, conveyor components, air springs, and so on. All of these parts are widely needed in industrial manufacturing.
Understanding Rubber Injection Molding
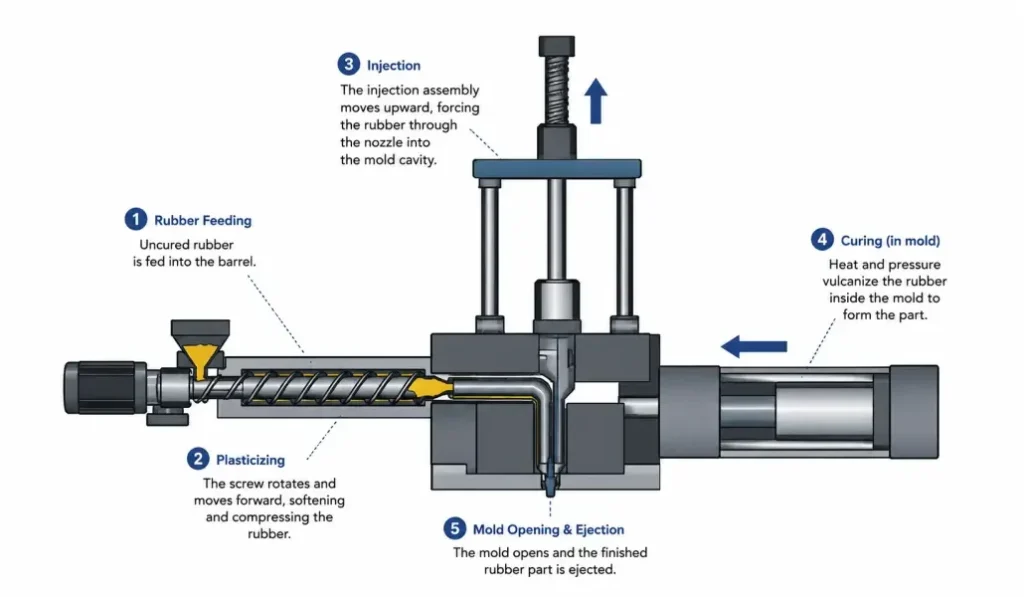
Rubber injection molding is generally a technique for shaping rubber. It’s a high-volume manufacturing process for rubber parts. In this method, a machine injects uncured rubber into a heated mold at high pressure. The high pressure forces the molten rubber to form the shape exactly as the mold. This way, the method produces many identical parts with great consistency. As a result, this method is an ideal option for continuous production.
What makes this process different from compression molding is that the raw materials are molten before pressing. However, in compression molding, both heating and pressurizing are applied at the same time. It poses a few limitations to the final part.
Compression molding can not ensure as high precision as injection molding. This method is quite slower than injection molding. Besides, flash and waste are more common too. This is where injection molding stands out and avoids such drawbacks.
Compared to transfer molding, it uses a hydraulic plunger to push material into a mold cavity. Transfer molding gives better precision than compression molding. However, it still does not match the precision level of injection molding.
With the rubber injection molding process, you can create a wide range of rubber products. In industrial manufacturing, its use is widespread. From automotive and electronics to medical and other industries, you can find it almost everywhere.
Rubber Injection molding typically has various types based on final parts complexity. The machine might be the same; the only thing that changes is the mold. For products that require changes in size, design, or materials, the mold changes. Typical injection molded rubber products include seals, medical diaphragms, gaskets, O-rings, and others.
Understanding the Rubber Injection Molding Device
In the rubber injection molding process, the right equipment plays the most crucial role. A good device ensures the best result and precise outcome for every project. It can control heat and pressure smoothly. Thus, it leads to fewer defects and errors during the process. Overall, the right device improves efficiency and reduces waste and downtime.
Injection Unit
The injection unit is a fundamental part of a molding device. It warms, pushes, and moves uncured rubber into a mold cavity. This unit also controls the injection speed and pressure for the molding process. One of its main purposes is to ensure even filling of the cavity. Precision injection control means uniform shapes and density, and it avoids short shots.
Clamping Unit
The clamping unit holds both molding halves together for an even, precise shape. It typically locks the halves during high-pressure injection. Different systems, including hydraulic, electric, and toggle, provide high pressure to withstand internal cavity force. Thus, it prevents the rubber from leaking out. Proper clamping also ensures an exact part size that matches the mold size.
Tooling System
The tooling system includes the molds themselves. They are highly engineered to meet the exact product shape and, in turn, the vulcanized rubber requirements. Good tooling ensures precise, repeatable results in each production cycle. Poor tooling leads to uneven results and material waste, causing significant time. For this reason, mold material and design matter a lot here.
Ventilation
A ventilation system is a must in the rubber injection molding process. It lets the trapped air escape from the mold. Volatile gases also escape when rubber fills the cavity. Without it, air pockets may form inside the cavity and weaken the rubber, causing defects. A good ventilation system improves the part quality significantly.
Rubber Injection Molding Process
The rubber injection molding process needs a systematic approach. Following these systematic steps is essential for industrial success. Skipping one of them can lead to heavy penalties. Together, they help maintain material flow, vulcanization, and exact dimensions. It delivers reliable, high-quality rubber parts. Below is a breakdown of every necessary step in rubber injection molding.
Step #1 Material and Processing Factors
Rubber comes in many types based on its manufacturing elements. Each type contains unique properties and works well for particular applications. Choosing the right material is crucial. Other processing factors also affect the final quality. Altogether, they determine part performance and durability.
Material Types
There are different types of rubber based on the elements used in their production. As you know, they work differently in various conditions. For example, natural rubber offers strength and flexibility, making it suitable for general use. Silicone rubber can withstand high heat. You may find it useful for medical and food items applications.
SBR is cost-effective and strong enough for wear resistance. You can use it in tires and seat belts. EPDM works better for outdoor applications, since it can resist environmental conditions perfectly. NBR is well suited for oil and fuel environments. Fluorocarbon (FKM) can resist wear in harsh chemicals and extreme heat in aerospace applications.
Additives
Different types of additives are mixed to improve rubber peroformance in the long run. Some common additives include colorants, fillers, plasticizers, antioxidants, and more. Each additive serves a clear purpose, and their mix ratio improves durability and functionality. Consequently, rubber becomes strong and ready for tougher jobs.
Shrinkage Control
When the rubber cures and solidifies after molding, it shrinks over time. You must calculate the shrinkage rate for each compound. In the case of injection molding, the shrinkage rate must be lower. Low shrinkage means fewer errors and fewer defects, helping you meet exact dimensions. Accurate shrinkage rate calculation is essential here for engineering tolerance.
Scorch Safety
Scorch typically refers to the pre-vulcanization state when rubber passes through a barrel or runner system. It happens when rubber cures prematurely and heats up quickly. Therefore, you have to maintain scorch safety to keep the rubber stable longer. Maintain proper mold filling initially and control the heating and timing periods too.
Step #2 Mold Preparation
Mold preparation is also a vital step in rubber injection molding. Proper mold preparation requires following a few steps. A well-maintained mold consistently produces clean, good results. It also affects the surface finishing.
Proper Cleaning
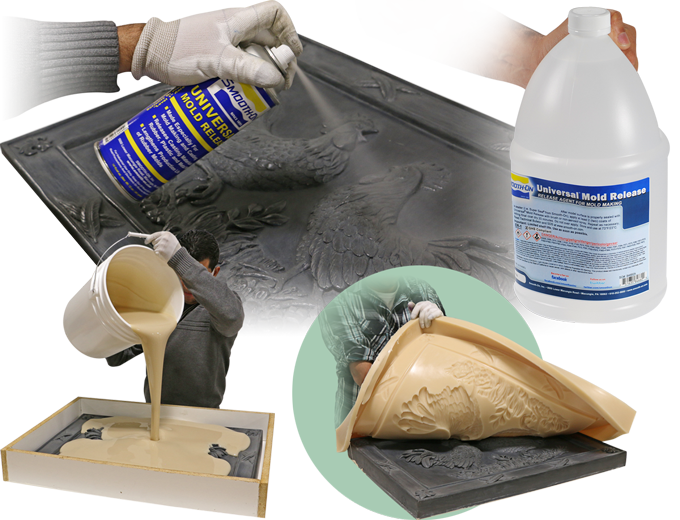
Before applying the release agent, inspect the mold surface to ensure it is clean. Clean the mold after every use. Please note that leftover residue degrades the product quality. On the other hand, clean molds mean better part quality.
Apply Release Agent
After cleaning, apply release agent over the mold surface. This is a critical step to ensure every part comes out safely without defects or damage. Without it, the rubber gets stuck to the mold. Make sure to choose the release agent according to your rubber types.
Inspect Vents
Inspect the vents after applying it. They let trapped air escape. If the vents are blocked, air pockets may form inside the mold, resulting in part defects. So, clear vents are essential to ensure rubber flow and avoid producing weak parts.
Heat Molds
Each mold requires proper heating before use because cold molds cure unevenly. Heating the mold ensures the rubber cures instantly on contact. Always heat the mold evenly to avoid soft and weak joints and parts.
Check Alignment
Check the guide pins for exact alignment. Every mold requires careful alignment. Otherwise, the molds might produce uneven parts, leading to material waste and costly charges. For this reason, you have to check the alignment before each cycle.
Step #3 Material Feeding
Material feeding refers to pouring rubber strips into the machine hopper. The turning screw automatically pulls the raw material towards the hot barrel. Uneven feeding causes structural deformation.
Step #4 Heat Compound
The heat compound makes the barrel heat up rapidly and evenly. It makes the rubber softer. Besides, it maintains a smooth flow of rubber. You must control the heat to avoid early curing as well.
Step #5 Measure Doses
The screw moves back and forth to collect the exact amount of soft rubber. This exact amount covers a single injection shot. Correct doses fill molds perfectly instead of causing flash and gaps.
Step #6 Mold Closing
After filling the mold cavity, strong hydraulic clamps shut the halves together with huge pressure. The clamping force holds them up and prevents rubber from leaking out. Such a strong closing force keeps the part of high quality.
Step #7 Inject Rubber
Now, the heated rubber is injected into the mold cavity. High pressure on warm rubber fills the cavity through narrow channels. This filling speed must be controlled during the silicone rubber injection molding process. Rapid speed ensures each corner fills perfectly.
Step #8 Pack Cavity
After packing, the machine continues to insert rubber through the channels. When the rubber cures, it shrinks, creating gaps. Extra insertion fills these gaps and improves strength. Thus, it also maintains the exact part dimensions.
Step #9 Curing
The high heat inside the mold then cooks the rubber and hardens the shape. In detail, it links rubber molecules together and makes the joints strong. As a result, it turns the soft rubber into an elastic and tough compound.
Step #10 Ejection
After curing, the object is now ready to eject. The clamping unit easily pulls the mold open. An ejector pin pushes the hot rubber out of the mold. It’s an automated process that occurs without damaging the part.
Critical Parameters for Injection Rubber Molding & Quality Optimization
Behind every successful rubber molding process, parameters are the main game-changers. Operators must control heat, speed, time, and pressure. These key variables need precise control. A small change in any of them can cause major damage. Besides, setting the right parameters means quality products every single time.
Process Parameters
Process parameters control the entire rubber injection molding process. Barrel heat, injection speed, backpressure, and clamping are the most crucial factors that drive the injection. Set the heat accordingly so the rubber won’t cure too quickly. Use appropriate pressure. Applying too much pressure can cause flash. On the other hand, too little pressure may leave the mold incomplete with rubber.
Speed matters as much. When you set a quick injection speed, it fills every mold evenly. Slower injection speed may leave a weak spot in the final product. Clamping force holds the mold with high pressure. Understanding these parameters eases your production complexity. This practice might reduce defects and help you save valuable materials.
Vulcanization Timing
Vulcanizing time controls how the rubber cures in rubber injection molding. It typically indicates how strong the rubber becomes inside the hot mold. Different rubber types require different heat and curing times. Therefore, you must match your rubber type with the proper heat and curing time.
If the time is too short, the molded part may remain soft and sticky. On the contrary, leaving it for too long may make the rubber hard and easy to break. To avoid such problems, test your rubber to find out the exact curing time. It gives the rubber robust strength, elasticity, and durability.
Quality Inspection
Quality inspection checks every product before shipping. Every finished part is rigorously inspected after rubber injection molding. Workers look for additional cracks, damage, size, flash, and gaps to meet exact quality standards. Not a single part remains unchecked. This step catches every problem and flags it.
In addition, workers look for burned parts and weak spots in products. Many people use different tools to measure thickness, hardness, and strength. Generally, visual checks come first, followed by other types of testing for better quality assurance. This way, it confirms the rubber part performs smoothly during use. It also reduces returns and complaints and builds customer trust.
Summary
The rubber injection molding process is a reliable, safe, and fast way to produce precise parts. This process utilizes many variables, such as speed, heat, pressure, and an automated system, for precision. To avoid costly charges, you also have to prepare the molds properly. Selecting the right rubber materials and setting up each parameter properly also matters a lot. Overall, precise control helps you achieve the best results.