AMINO https://aminoreleaseagent.com/ Mon, 13 Jul 2026 09:26:32 +0000 en-US hourly 1 https://wordpress.org/?v=7.0 https://aminoreleaseagent.com/wp-content/uploads/2025/03/cropped-logo_website_icon-32x32.webp AMINO https://aminoreleaseagent.com/ 32 32 How Is Polyurethane Foam Manufactured? https://aminoreleaseagent.com/blog/how-is-polyurethane-foam-manufactured/ Mon, 22 Jun 2026 03:30:57 +0000 https://aminoreleaseagent.com/?p=4443 In many situations, especially when storing or shipping fragile items, protecting them is critical. In shipping, it is quite common to encounter impact. If this impact is not absorbed, the item in the box may be damaged. That’s where polyurethane foam comes in. The use of PU foam is also common in the automotive, construction, [...]

The post How Is Polyurethane Foam Manufactured? appeared first on AMINO.

]]>
In many situations, especially when storing or shipping fragile items, protecting them is critical. In shipping, it is quite common to encounter impact. If this impact is not absorbed, the item in the box may be damaged. That’s where polyurethane foam comes in. The use of PU foam is also common in the automotive, construction, and furniture industries. In this comprehensive guide, you can learn how polyurethane foam is manufactured and customized.

Overview of Polyurethane Foam

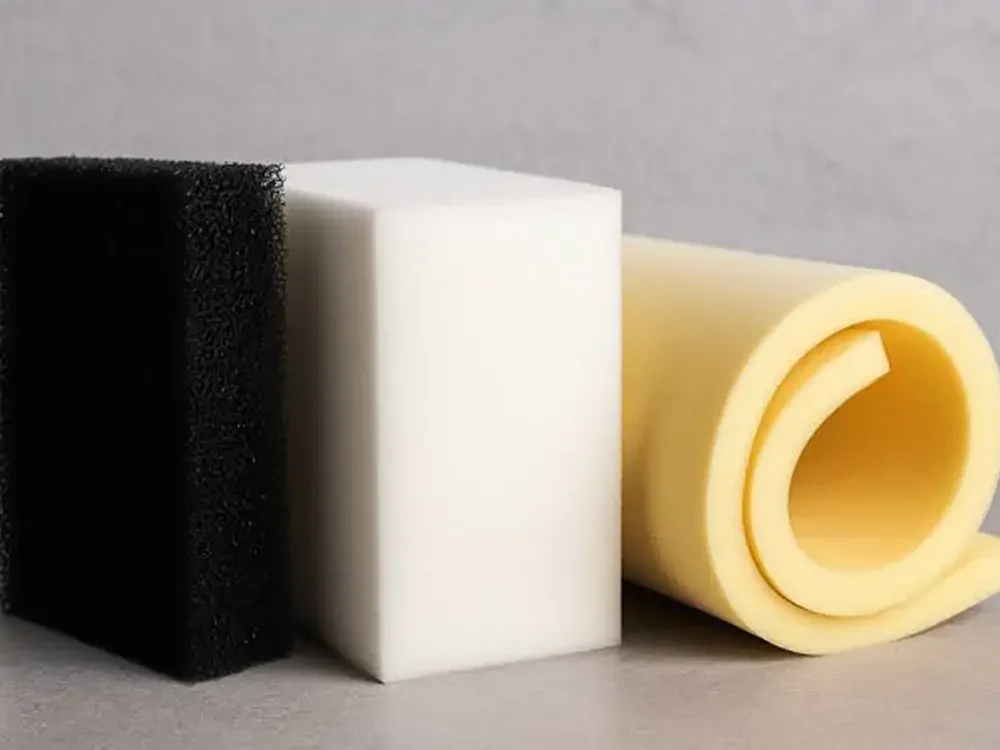
Polyurethane foam is a flexible, lightweight, and cellular plastic material produced through exothermic chemical reactions. This reaction occurs between two crucial compounds: polyols and diisocyanates. When you mix these elements together, they react to form a rigid, soft structural foam with tiny air-bubble gaps. It typically contains two phases. A solid phase formed by a polyurethane elastomer and a gaseous phase that contains air made by blowing agents.

polyurethane foam

In terms of types, there are generally two: open-cell and closed-cell foam. You may already guess what open cell does. Well, it interconnects with bubbles, letting air flow smoothly through and making it soft and springy. On the other hand, closed-cell does the opposite. It traps the gas inside the bubbles, which makes it stiff, strong, and waterproof as well.

Polyurethane foam manufacturing has wide applications across various sectors and is used worldwide. However, its application also depends on the type of polyurethane foam you use. Open-cell polyurethane foams are ideal for everyday use in comfort products such as car seats, mattresses, and couch cushions. Closed-cell foams are perfect for making building insulation and safe packaging. From automotive to medical, electronics, you can find its application in every industry.

In short, polyurethane foams are highly versatile and safe for use. It can be soft or hard, depending on the chemical formula. It helps to shape our daily comfort and protects our homes.

Properties of Polyurethane Foam

Polyurethane foams have significant properties that make them worth using. In the following, we have categorized these properties into five types.

  1. Physical Properties: Polyurethane foam has unique physical properties. They are lightweight as they consist mostly of trapped gas. Also, its low density makes it suitable for transport and installation for various applications. As mentioned before, it can also be soft or rigid depending on the chemical composition.
  2. Mechanical Properties: Polyurethane foam has tensile strength and is resistant to tearing. Its building quality allows it to endure repeated compression without breaking. This foam can also easily resist impacts and structural loads.
  3. Thermal Properties: Generally, rigid polyurethane foams are popular for thermal insulation. This material has the lowest thermal insulation values among various insulation materials. Here, the closed cells trap insulating gases and effectively block heat transfer. 
  4. Chemical Properties: It can resist oils, chemicals, and other solvents. When it’s rigid, the inside has high inertia. Anyway, if you keep it exposed to UV rays for a long time, the quality might degrade. For flame resistance, you can use fire-retardant elements.
  5. Acoustic Properties: PU foams are used to reduce noise and vibration. The open-cell performs better for sound absorption than the closed-cell. So, make sure to choose the right one for your application.

Raw Materials used in Polyurethane Foam Production

There are different types and compositions of polyurethane foam. The properties of PU foam are largely determined by the raw materials. Here, each ingredient serves a specific purpose. It influences the polymer structure. It also controls the foam expansion and curing. The following 6 raw materials are widely used in polyurethane foam manufacturing.

Polyol

Polyol is a crucial chemical compound that acts as the backbone of PU foam. It’s a complex liquid that consists of hydroxyl groups. This liquid directly reacts with diisocyanate to form a polymer. It determines whether the foam is flexible or rigid.

Diisocyanate

Diisocyanates are highly reactive. They react with polyols to form a urethane structure. TDI and MDI are the most common types. TDI suits flexible foams, and MDI is ideal for rigid ones.

Blowing Agents

Blowing agents help to create gas bubbles inside the foam. Water is a commonly used chemical blowing agent that reacts with isocyanate to generate CO₂ gas, forming the cellular structure.

Surfactants

Surfactants are mostly silicone-based. They stabilize the liquid foam by lowering its surface tension. They control cell size and uniformity. Without this ingredient, cells might collapse or merge.

Catalysts

Amine catalysts generally balance and accelerate the blowing reaction (gas generation), while tin catalysts primarily promote the gelling reaction (polymer chain linkage). Always use the right balance of catalyst. They affect foam quality and processing time.  

Cross-linkers

Cross-linkers are vital for polyurethane foam manufacturing. They interconnect separate polymer chains together. This way, it improves the overall structural strength, firmness, and durability of the cured foam.

Other Additives

Adding other additives depends on the specific use of the end foam. These additives can be flame retardant, colorants, anti-microbial, and so on. You may also use UV stabilizers to protect from sunlight.

How is Polyurethane Foam Manufactured

There is no single way to manufacture polyurethane foam. The production method often depends on the shape, properties, and intended use of the final product. Before foaming begins, you must carefully prepare the polymer system. From there, you can use different processing methods to produce the foam. The exact method depends on the specific application requirements.

Polymer System Preparation

Before you start the production, prepare all the raw materials. It is a critical step. Blend the polyol with the surfactant, catalyst, and other additives, depending on the foam type. Separate the isocyanate in another area. Heat the materials to a precise temperature. Then, you have to meter and mix them with exact ratios. Thus, proper preparation will help you produce strong, uniform-quality foam.

Slabstock Foam

Slabstock foam is a common and continuous polyurethane foam manufacturing process. After mixing the chemical liquids, workers pour them onto a moving belt. The liquid expands rapidly as it moves down the line, rising into a long, continuous block of foam. Thereafter, the continuous foam loaf is cut into smaller blocks using specialized saws and left to cure for up to 72 hours.

MK-HR305 Solvent Based Release Agent For PU Flexible Foam

Molded Foam

Molded foam production is a discontinuous, precise process for manufacturing polyurethane foam. In this process, the liquid chemical mixture is poured into a pre-heated, closed metal mold cavity. Then, it expands rapidly, taking the exact shape of the mold. This way, molded foam can produce consistently uniform foam with smooth outer skins. You may find its application in complex-shaped foam in the automotive industry.

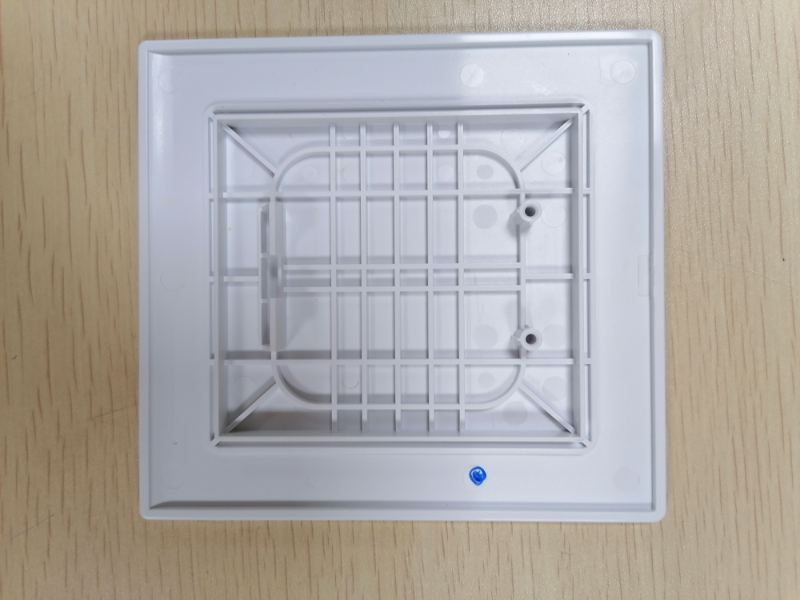
Rigid Polyurethane Foam Release Agent

Lamination

Lamination is the process of bonding polyurethane foam directly with other facing materials, such as aluminum foil, kraft paper, or fiberglass. During production, the reactive chemical mixture is dispensed between two continuously moving facings on a conveyor. As the foam expands, it adheres firmly to both surfaces simultaneously. This process creates high-strength, rigid sandwich panels that are widely used for thermal insulation in the construction and industrial refrigeration sectors.

Spraying

Spraying is an effective on-site manufacturing method. Using two elements at the gun tip, both react immediately upon contact and directly apply to the foam surface. Surfaces could be walls and roofs. Foams rapidly expand and adhere to surfaces, allowing them to fill cracks, gaps, or irregular surface structures. Despite expanding rapidly, it also cures quickly and creates seamless layers.

Customizing Polyurethane Foam for Diverse Applications

One of the key benefits of PU foam is its ability to customize for different uses. You can adjust various properties to achieve the desired performance. Although many factors can influence final foam properties, the following are among the most common parameters.

Density

Density is the mass per unit volume. In PU foam, a higher density typically means more material and less gas space, which leads to higher structural load capacity. The right choice depends on the application loads and performance requirements.

Flow & Speed of Cure

Liquid flow and cure speed depend on the catalyst you use. Fast curing is suitable for quick molding cycles. While slow curing and liquid flow speed are suitable for large and complex mold shapes, they allow the liquid to fill the mold completely.

Fire retardants

Fire retardants are used to meet safety standards. They slow the ignition, and the flame spreads. Here, manufacturers use both reactive and additive elements. Choose the right element according to your fire ratings.

Closed Cells or Open Cells?

You can customize your PU foam by using the right surfactant. It determines whether the foam is closed- or open-cell. Closed cells trap gases, making them ideal for thermal insulation. Open cells allow gas to pass, perfect for soft cushions.

Summary

Polyurethane foam is a versatile material used across many industries. You can control its performance by customizing the raw materials and additives. The polyurethane foam manufacturing is highly customizable. You can customize properties such as density, curing behavior, fire resistance, and cell structure.

You might need PU foam for packaging, furniture, automotive components, or whatever else; a single type of PU foam is not enough. That’s where understanding the polyurethane foam manufacturing is critical. If you have any questions, feel free to reach out to our customer support team.

Polyurethane foam release agent plays a crucial role in PU foam manufacturing. Amino Release agents offer a wide range of PU foam release agents. There are different types that fit into various forms of polyurethane manufacturing. Contact us today.

The post How Is Polyurethane Foam Manufactured? appeared first on AMINO.

]]>
Aluminum Die Casting Process: A Complete Guide https://aminoreleaseagent.com/blog/aluminum-die-casting-process-a-complete-guide/ Mon, 22 Jun 2026 03:15:28 +0000 https://aminoreleaseagent.com/?p=4437 The aluminum die casting process is one of the most common methods for shaping Aluminum. It involves heating the material, injecting it into a mold, and forming it into the required shape. Well, you may find it easy at first. However, in reality, many factors are involved. The way you are doing it, the correct [...]

The post Aluminum Die Casting Process: A Complete Guide appeared first on AMINO.

]]>
The aluminum die casting process is one of the most common methods for shaping Aluminum. It involves heating the material, injecting it into a mold, and forming it into the required shape. Well, you may find it easy at first. However, in reality, many factors are involved. The way you are doing it, the correct die-casting parameters, and the proper use of a releasing agent all matter.

The aluminum die casting process can produce strong, lightweight, and accurate parts. It is suitable for making complex shapes with a smooth surface finish. Therefore, it is widely known for making auto parts, structural components, and electronics.

However, getting a good casting result is not only about melting Aluminum and filling the mold. Instead, the mold’s surface needs to be smooth too. This is why it’s important to use a release agent. It typically helps the aluminum part exit the mold smoothly.

In this guide, we’ll show you how to die-cast aluminum step by step. We will also discuss the important role release agents play and how they improve casting.

What is Aluminum Die Casting?

Aluminum die casting is one of the most popular metal-forming processes for creating precise metal parts. This method is widely used to create various types of aluminum parts.

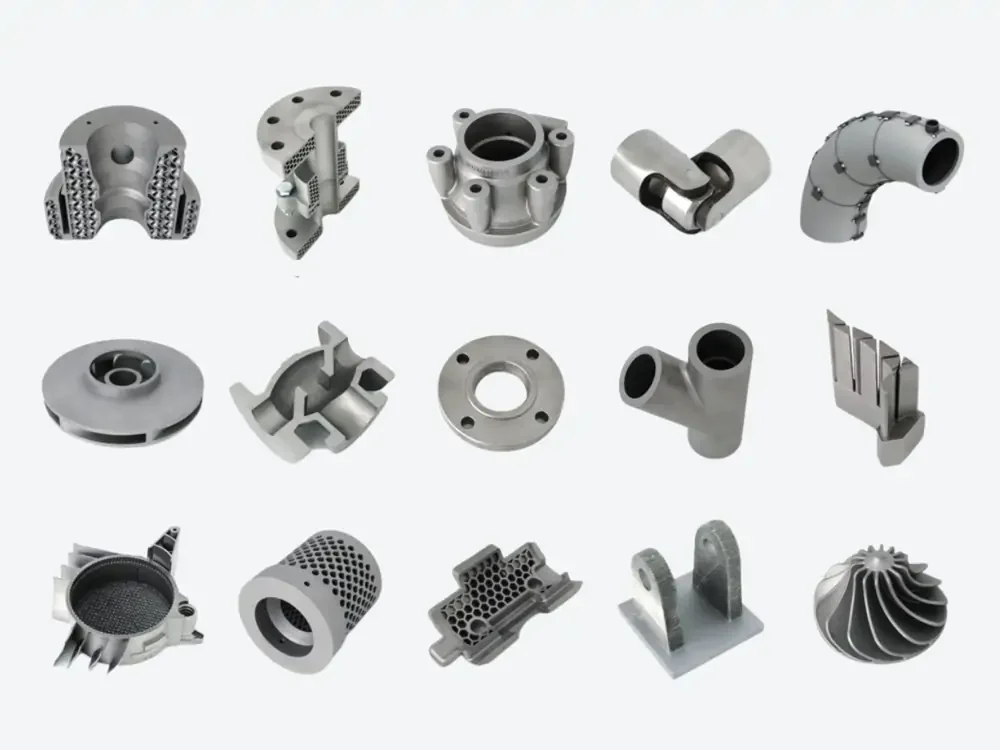
aluminum die casting parts and products

In the die-casting process, molten Aluminum is forced under high pressure into a reusable mold. Using high pressure allows the material to fill each corner of the mold. This way, it can take on any shape within the mold interior without deformation. While traditional forming methods allow you to create a more detailed shape, die casting allows you to create a more detailed shape.

The process begins by melting the Aluminum using high heat. The system provides heat until the metal liquifies completely. Next, a hydraulic plunger pushes the liquid metal into a steel die cavity at high speed. The metal solidifies in the mold almost instantly. Then, the mold opens and, using a mechanical pin, ejects the part.

There are primarily two types of metal casting setups. One is a hot-chamber machine, and the other is a cold-chamber machine. Hot-chamber setups are ideal for metals with low melting points, such as zinc. However, Aluminum is usually shaped in the cold-chamber machines. This setup separates the melting and injection plunger to protect the equipment.

The aluminum die casting process has vital applications across various industries. This method can produce lightweight, strong, and highly complex parts with a high-quality surface. Car manufacturers take advantage to create lightweight engine blocks, brackets, cases, and other crucial parts. The electronics sector produces chassis, frames, and often heat sinks. It is also common in aerospace and home power tools.

Aluminum Die Casting Process: Step by Step

The aluminum die casting process requires proper control at every stage. Each step can affect the final molded part. It can change the strength, shape, surface finish, and overall quality. So, if you want a good casting result, you need to control the process carefully from the beginning to the end.

Mold Design and Preparation

Mold design is a vital step in the die casting process. Without a strong, functional mold, you can’t achieve the best possible results. You might need extra finishing tasks to smooth the surface, which adds cost and can eventually make your project less profitable.

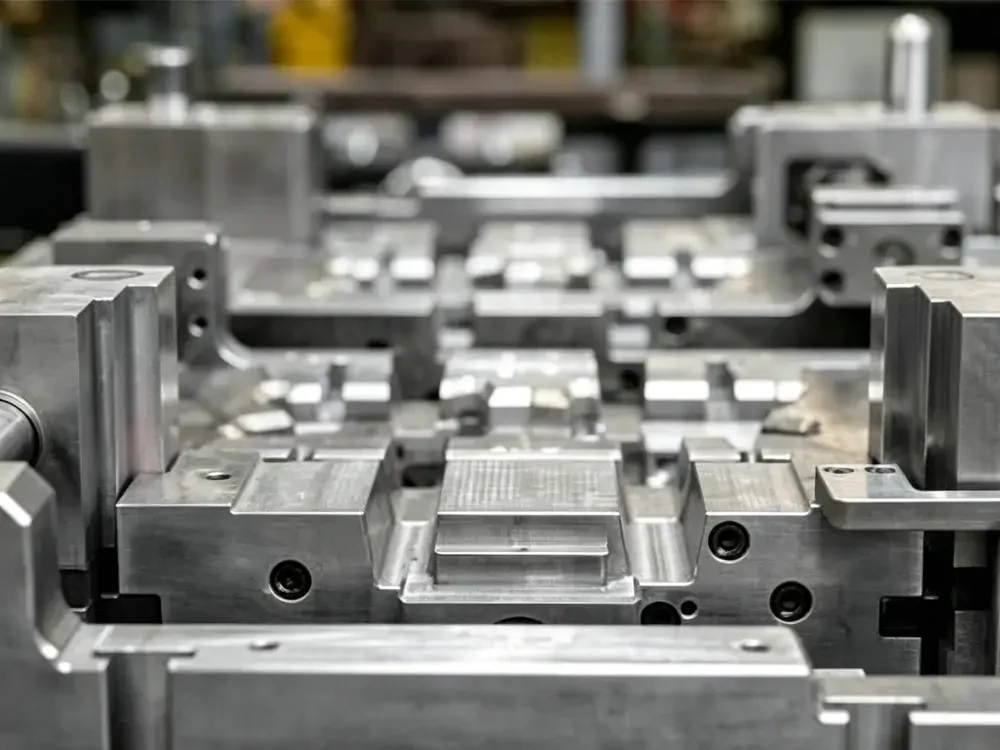
professional aluminum die casting mold design

Therefore, mold design must be professional and detailed. Every part, including the narrow channels and cooling lines, must be properly controlled. A professional mold design can significantly reduce molding defects.

Proper design ensures the mold can withstand heat, extreme pressure, and other conditions. After creation, inspect the mold for any cracks or damage, both inside and outside. Then, the mold is preheated to avoid thermal shocks during injection.

Mold Cleaning

Mold cleaning is also an essential step for casting cycles. You have to thoroughly clean the mold and remove any dirt, dust, oil, or old residues. Such contamination in the mold can ruin part formation. Even a tiny particle can degrade the surface quality. Therefore, ensure your mold is clean and ready for casting.

You can use either special brushes or compressed air for cleaning. When the surface is spotless, it ensures a clear surface, allowing molten metal to fill every corner and every detail of the mold perfectly. Not a single detail remains missing. Cleaning also extends the mold’s lifespan and prevents damage and rust.

Application of Releasing Agent

A release agent is typically a chemical applied to the surface to provide non-stickiness. It is one of the most crucial parts of the die casting process. When you apply the agent, it creates a non-sticky barrier between the mold and the molded part. The main purpose of this thin layer is to facilitate the easy removal of the casting part.

Release agents work by forming a thin, heat-resistant layer. After pouring the red-hot molten metal, this layer prevents direct bonding with the mold. Moreover, it manages heat smoothly, keeping the mold surface cool during production cycles. For such advantages, you may find its application not only in metals but also in plastics, PU foams, and so on.

Clamping

Clamping is a step to hold two die halves together quite tightly. Generally, it occurs before the mold injection process. Here, a hydraulic system is most effective. It presses one moving half die to a fixed half die. Thus, the hydraulic system produces an enormous pressure known as clamping force. Since the pressure is too high, it is measured in tons.

Without such a heavy clamping force, the incoming molten metal can easily leak out. So, this force is necessary to resist the upcoming pressure. This force may vary depending on the die types. For example, small dies require less force, while large and complex dies require more force. Deploy the force accordingly. Proper clamping ensures accurate dimensions for molded parts.

Melting of Aluminum

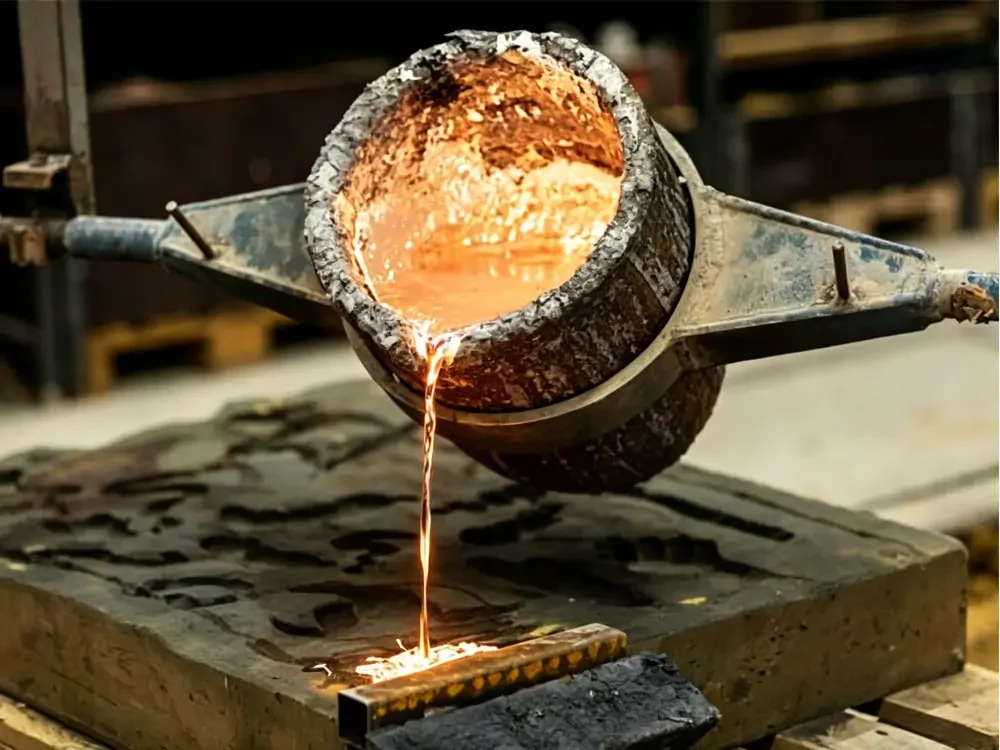
For aluminum melting, makers place the ignitors into high-temperature furnaces. Here, the furnace heats the metal until it liquifies completely. The temperature is almost 660°C. Monitor the melting process until all the ingots have fully melted.

melting and pouring molten aluminum

During the melting phase, you may see some impurities float on the top. Scope them away to avoid trapping bubbles and weak spots in metal parts.

Injection of Molten Aluminum

Injection is the initial step where the molten metal fills a die. Most manufacturers use a mechanical ladle to scoop red-hot metal. A furnace holds the red-hot metal. Thereafter, it pours the material into the machine’s cold shot sleeve. Then, a hydraulic plunger takes over the injection process.

This plunger pushes the metal at high speed, allowing it to fill the entire cavity. Using high speed creates immense pressure for metal. Not a single channel remains skipped. It fills each corner and captures every detail. Both fast and slow speeds may cause some problems. Choose the right speed for a dense and defect-free product.

Holding Pressure and Cooling

Holding pressure begins just after the mold fills completely. When dies become filled with liquid metal, the machine maintains its pressure, called holding pressure. The hydraulic plunger tries to push hard against the aluminum. This way, it prevents gaps from forming during solidification due to metal shrinkage. Without holding pressure, the product might contain weak spots and void spots on the surfaces.

Now the cooling line starts operating inside the mold, significantly lowering the temperature. Different types of liquids, such as water and oils, flow through the channel to dissipate heat. As a result, the liquid metal turns into a solid, strong part within just a second. Proper cooling produces solid structure parts without any air gaps.

Ejection

Injection is the step where the finished part leaves the mold. At the initial stage, the hydraulic clamping opens up the moving half die. The solid aluminum part remains attached to the moving half die. It is ready to safely push out the metal product.

Most commonly, the mechanical pin ejector pushes the metal from behind the mold. These pins later hit the surface evenly, bringing out the part without bending or breaking it. A robot then takes the product that drops on the conveyor belt. Thus, the mold is cleared and prepared for the next cycle of the aluminum die casting process.

Surface Treatment and Finishing

Surface treatment is the last step of the Aluminum die casting process. This treatment begins once the metal has been properly hardened and cooled. The first thing you should do is to eject the new casting part carefully. Then you can use a cutting machine to trim off any excess material.

Besides, you can tumble or blast to smooth, neat, and clean the rough surface. Later, you can apply a custom coating to meet your project needs. You can paint, powder coat, or plate. Every form of coating has its own advantages and disadvantages. However, coating protects the surface from rust, moisture, and normal wear.

The Importance of the Releasing Agent in Aluminum Die Casting

The releasing agent is one of the most important materials in aluminum die casting. It directly impacts casting quality, die life, and production efficiency. With an effective releasing agent, you can significantly reduce surface defects. Sometimes, not using RA or using poor-quality RA can lead to mold damage or a sticky, molten material. It may increase maintenance costs and shorten mold life.

Prevent Sticking

The main purpose of using a release agent is to create a non-sticky barrier. It forms a thin layer between the steel mold and the molten Aluminum, preventing sticking. Also, using RA allows parts to eject easily from the mold.

Improving Surface Quality

The release agent also improves the surface quality of die castings. Using an effective mold release agent ensures no rough spots or scratches during ejection. It greatly helps create a smoother, more consistent finish. Eventually, it reduces the need for additional polishing or rework.

Protecting the Die

Molten Aluminum is highly corrosive to steel molds. But the release agent shields the mold from extreme pressure and heat. As a result, steel molds remain safe, and agents help to extend mold life.

Controlling Temperature

During the aluminum die casting process, the thin layer formed by the releasing agent also helps control temperature. This layer reduces direct heat transfer. Besides, it helps distribute heat more evenly across the mold. Many water-based release agents also provide a cooling effect as the water evaporates after spraying.

Boosting Efficiency

Using a proper release agent speeds up the production cycle. Easy part removal reduces downtime during cleaning or machine jams. This way, it increases output, which effectively lowers overall cost.

Best Releasing Agent for the Aluminum Die Casting Process

You cannot just use a releasing agent in the die-casting process. The agent’s compatibility is also very important for smooth separation. The following two releasing agents are widely used in the aluminum die-casting process. We recommend that you seek expert advice to ensure the correct type of releasing agent is used.

mk-tl-die-casting-release-agent-for-pure-aluminum

Die Casting Release Agent for Pure Aluminum MK-TL

Amino MK-TL is a water-based release agent for pure aluminum die casting. When you apply the release agent, it forms a strong, non-friction film on the mold surface. Each part comes out smoothly with zero carbon buildup. It can also resist temperatures up to 300°C and meets RoHS and ISO 16949 standards for safe use.

Water-Based Aluminum Die Casting Mold Release Lubricant MK-2232W

Amino MK-2232W is also a water-based release agent. It’s a stable, non-hazardous, and easy-to-clean lubricant suitable for aluminum die casting. This agent also provides an exceptionally bright and smooth surface finish. It complies fully with RoHS and REACH standards. Its flexibility allows for both manual and automated spraying.

Summary

Aluminum die casting is a fast, precise, and reliable process. It is widely used to produce strong and lightweight aluminum parts. There are numerous benefits of die casting. However, understanding each of its parameters and quality factors is crucial.

Proper mold design, preparation, release agent, and effective post-processing are key to success. Eventually, a professional setup ensures consistent production with high-quality parts.

In the aluminum die casting process, the right release agent is crucial. Not all release agents can give you the expected outcome. Therefore, choosing the right and compatible releasing agents matters.

The post Aluminum Die Casting Process: A Complete Guide appeared first on AMINO.

]]>
How to Build a Fiberglass Boat: Step-by-Step Guide https://aminoreleaseagent.com/blog/how-to-build-a-fiberglass-boat-step-by-step-guide/ Fri, 29 May 2026 01:21:58 +0000 https://aminoreleaseagent.com/?p=4248 Building a fiberglass boat from a mold could be a rewarding DIY project. The whole job needs careful planning, patience, and time. From preparing the mold to giving it a good look, every step matters. This article presents a step-by-step guide to building a fiberglass boat. It includes everything from choosing the right material to [...]

The post How to Build a Fiberglass Boat: Step-by-Step Guide appeared first on AMINO.

]]>
Building a fiberglass boat from a mold could be a rewarding DIY project. The whole job needs careful planning, patience, and time. From preparing the mold to giving it a good look, every step matters.

This article presents a step-by-step guide to building a fiberglass boat. It includes everything from choosing the right material to making the mold to achieving a good finish. You can follow this guide to create your own boat. For more expert assistance, you can contact our customer support team.

What is a Boat Mold?

A boat mold is a specialized, reusable form used to construct boat hulls and decks. It can be used for the mass production of the same shapes and sizes. In the production of the fiberglass boat, the mold is the main functional component. It acts as the physical template of the boat. This template later makes the entire structure of a boat hull and deck.

For your better knowledge, there are two types of boat molds used in manufacturing. One is a female mold that defines the exterior shape, creating a smooth finish on the exterior. On the other hand, another type is known as male mold. This mold is a positive structure that confirms the boat is finished to perfection. Many builders use male molds to create female molds, just to make a smooth inside structure.

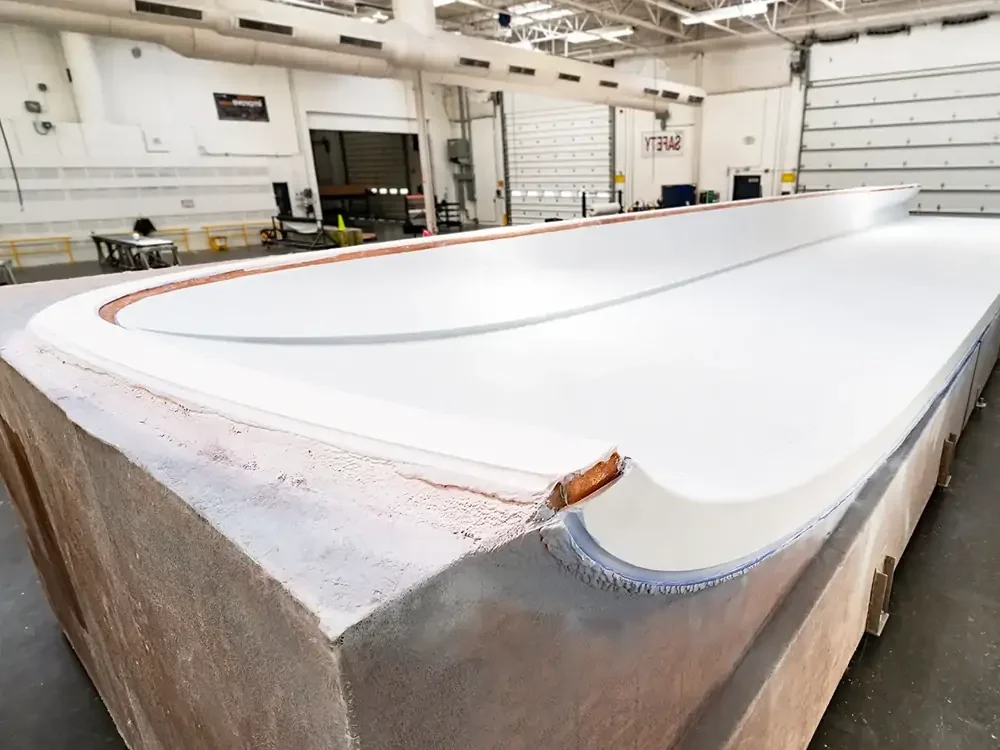
boat mold

The surface of the boat mold must be smooth and perfectly shaped. If there is any dent, scratch, or anomaly on the mold surface, it might lead to a similar anomaly on the boat surface. This way, your boat may not be very functional during use. To avoid such issues, builders spend time polishing, sanding, or often waxing. This meticulous preparation makes a professional finisher.

Boat molds have three primary applications in the marine industry. Firstly, these molds enable the quick production of identical fiberglass hulls in factories. Secondly, the commercial sector uses deck molds to produce various types of interior floors, seating areas, or storage lockers. Lastly, they are used for testing hulls before starting mass production.

Materials and Tools You’ll Need

To build a fiberglass boat, you will need the right materials and tools. Low-quality materials may not provide a durable solution. Good supplies help create a stronger and longer-lasting boat. Specifically, pay attention to the structural components and ensure they can support the load. The following table lists all necessary materials and tools, along with their unit prices.

Materials/Tools Purpose Estimated Cost (USD)
Fiberglass Cloth, 12 oz Biaxial Mat Hull skin, transom layers $12-$17 per yard
Resin + hardener, epoxy Bonds fiberglass layers $65-$110 per kit
Polyester resin Lower cost Alternative to Epoxy $35-$50 per gallon
Gel Coat Outer Finish if using polyester resin $70-$95 per gallon
Marine Polyurethane paint Finish if using epoxy resin $90-$135 per gallon
Mold release agent / PVA Helps hull release from Mold $15-$25 per bottle
Brushes / Rollers / Squeegees Applying resin and removing bubbles $10-$25 per set
Sandpaper/sanding discs Surface prep and fairing $15-$30 per pack
Grinder / electric sander Shaping, sanding, and repairing $40-$90 each
Safety gear Gloves, goggles, respirator, coveralls $35-$60 set
Foam core/honeycomb core Decks, sides, lightweight panels $60-$120 per 4×8 sheet
High-density transom foam / Coosa board Transom and screw-holding areas $350-$550 per sheet
Stringer foam Keel and side structural support $25-$50 per piece
2 lb flotation foam Under-deck buoyancy and sound dampening $100-$140 per 2-gallon kit
3M 5200 marine adhesive Bonding stringers/panels $22-$28 per tube
Fairing compound Filling hull imperfections $45-$75 per kit

How to Build a Fiberglass Boat: Step-by-Step Guide

This step-by-step can help you avoid many common mistakes during the process. It is especially useful if you are a beginner and want clear guidance from start to finish. If you plan to customize your boat, carefully check the compatibility of the resin, fiberglass, foam core, and other materials before you begin.

Step 1: Prepare the Mold

The very first thing you need to create a fiberglass boat is the boat mold. In this case, you will need two different types of molds: female and male. The female mold forms the boat’s external shape. On the other hand, the male mold forms the internal shapes. In earlier days, people used wooden plywood frames for the male molds. However, today, both molds are made of fiberglass-reinforced plastic or other durable composite materials.

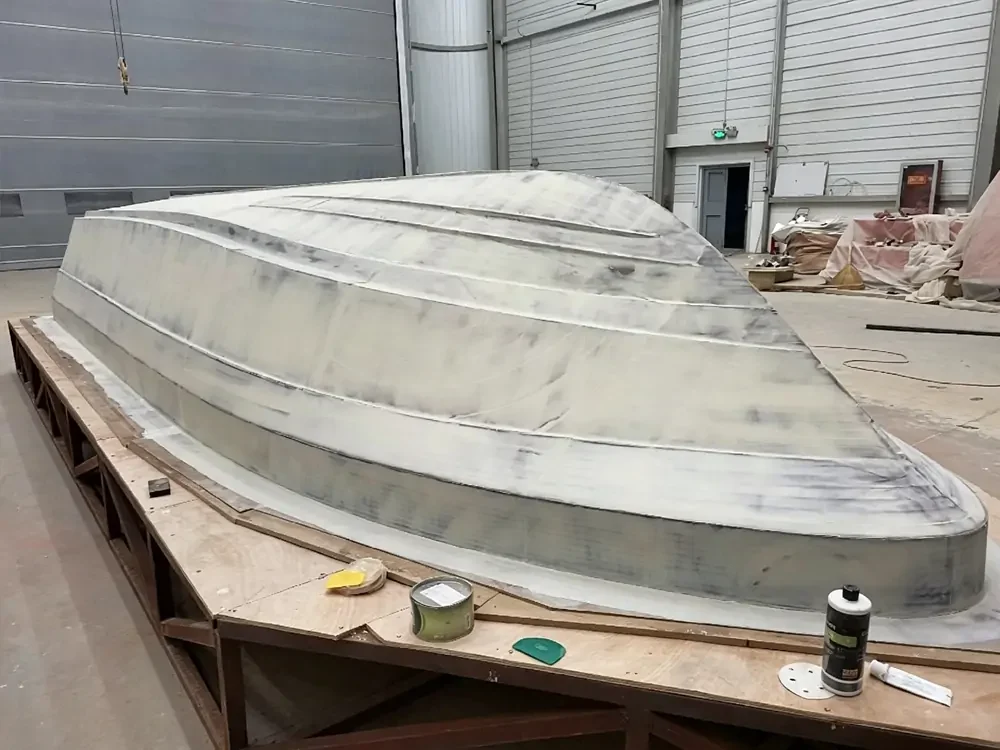
fiberglass boat female mold preparation

So, you’ve got the molds, and it’s time to start making the fiberglass boat. First, check the surface condition. If there is any dirt or dust, make sure to clean off the surface to make it smooth. You can sand the surface to remove any imperfections. Otherwise, this dirt and dust may ruin the release agent’s quality, leading to an improper boat finish.

Step 2: Apply Mold Release Agent

Release agents are the most important elements used for building a fiberglass boat. They create a slick, chemical-resistant barrier on the mold surface. It prevents liquid resins from bonding to the surface, allowing the hull to separate safely.

Always apply the mold release agent when the surface is properly clean. Recheck the surface, then apply five or six coats of paste wax to the clean mold. After waxing, apply a polyvinyl alcohol (PVA) release agent to the top. It creates a barrier between the mold and the molded part, preventing the molded part from attaching.

fiberglass release agent

Step 3: Apply Gel Coat or First Resin Layer

Gel coat is one of the essential components in the process of making a fiberglass boat. It makes the boat’s smooth, colorful outer skin and protects the underlying material. Try to keep this layer 20 to 25 mils thick. With this layer, you can create a shiny, long-lasting outer skin for the boat. After the application, let it cure properly.

applying fiberglass release agent on fiberglass mold

Step 4: Choose the Right Resin

Choosing the right resin also matters a lot. It determines your boat’s strength and the level of water protection. To achieve optimal results, select your plastic resins based on the strength and the project budget. You may use polyester, epoxy, and other resins. Polyester is well-known for its rapid curing and affordability. Epoxy resin is costly but comparatively strong and waterproof. Never mix different resins together.

Step 5: Laminate the Hull Structure

Make fiberglass cloth or a mat to fit your mold. Apply the first layer onto the gelcoat. This initial layer helps prevent the fabric texture from showing on the outside. After this, apply the mixed resin on fiberglass cloth. In this case, use a brush or roller to avoid bubbles or white blanks and saturate the cloth.

Add a layer of fiberglass, but one at a time. Use woven roving and chopped strand mat alternately. Each layer offers more strength due to its thickness. Allow each layer to dry for a while before applying the next layer. Typically, small boats need four to six layers. But larger ones may need more layers based on the size.

Step 7: Add Stringers and Structural Support

Stringers are the strips of foam or wood. These parts are longitudinal and run along the bottom of a boat’s hull. It’s one of the main parts of a boat and serves as the backbone. Make sure to place the stringers properly; it will make the boat stronger and safer.

Step 8: Release the Hull from the Mold

Wait for the hull to cure fully. It may take 24 to 48 hours for curing. Insert the wooden wedges in the mold edges. Never use metal tools for this work, since they can cause damage. Separate the hull from the mold slowly and evenly. If you notice any rough edges, trim them with a grinder when building a fiberglass boat.

Step 9: Fair, Sand, and Finish the Hull

Inspect your hull for any imperfections or missing portions. If so, fill them with fairing compound and ensure there are no imperfections. You may sand the hull progressively. Start with 80 grit and end up with 400 grit. Apply an epoxy coating in 2-3 layers, then lightly sand each layer.

fiberglass boat hull sanding and finishing

Step 10: Build the Deck and Interior

Build the deck as a separate fiberglass lay-up. You can use fiberglass tape and glue to attach it to the hull. Seal all joints carefully inside and outside. Fit bulkheads and floor supports. Add seats and storage areas. For interior woodwork, use marine-grade plywood. At this point, coat the wood with epoxy resin to prevent rot and water damage when fiberglassing a boat.

Step 11: Add Hardware and Final Details

Install all the necessary hardware one by one for building a fiberglass boat. These hardware items include cleats, hatches, bow eyes, steering, and so on. Mount the motor outdoors on the transom. Add a light and bilge pump. Set up your battery and cable wiring perfectly. Add foam in the enclosed spaces. Double-check all the hardware and component attachments. Do a water test before taking the boat.

Conclusion

Building a fiberglass boat is a bit challenging, but also highly rewarding. Follow all the steps carefully, from choosing materials to finishing. Thus, you will create a strong, beautiful vessel. Grab all the necessary gears, prepare your mold, and start laminating.

For further inquiries, don’t hesitate to contact us. If you need any help, we are always ready to provide accurate information and assist you.

The post How to Build a Fiberglass Boat: Step-by-Step Guide appeared first on AMINO.

]]>
Common Injection Molding Defects and Solutions https://aminoreleaseagent.com/blog/common-injection-molding-defects-and-solutions/ Thu, 21 May 2026 02:25:48 +0000 https://aminoreleaseagent.com/?p=4219 Almost 99% of plastic parts used in regular applications are produced by injection molding. It is the most common method of shaping elastomer products. And it is widely needed in automotive, electronics, and medical devices. When working with injection molding, defects can happen. There are various reasons for various types of injection molding defects. Don’t [...]

The post Common Injection Molding Defects and Solutions appeared first on AMINO.

]]>
Almost 99% of plastic parts used in regular applications are produced by injection molding. It is the most common method of shaping elastomer products. And it is widely needed in automotive, electronics, and medical devices. When working with injection molding, defects can happen. There are various reasons for various types of injection molding defects.

Don’t worry! There are solutions to avoid such defects and create high-quality parts. One crucial solution is to use mold release agents. In this article, we will learn the most common injection molding defects and solutions. You will also learn how a mold release agent can reduce these defects and ensure a consistent production line.

Role of Mold Release Agents in Injection Molding

Mold release agents are the chemical-formulated substances used in injection molding. When you apply it to the mold surface, it creates a non-sticky layer between the mold surface and the product. Using them on the mold surface makes the entire process more reliable. It stops the polymer from sticking to the surface during cooling.

release agent for plastic

Mold release agents typically come in various forms. The most common forms include sprays, wax, oils, and many more. You can use them directly on the mold using a brush, cloths, or spraying. Also, you can mix it directly into plastics as an internal agent. Either way, the RA acts as a barrier between the mold and the molten material. Without this layer, plastics or other materials can easily bond with the mold surface. Some of the most common benefits of mold release agents are:

  1. The primary reason for using RA is to prevent the molded part from sticking to the mold surface.
  2. It lowers friction during part ejection. As a result, it speeds up ejection and production rates.
  3. After Completion, it ensures a perfect and damage-free ejection.
  4. The mold release agents also improve the quality and appearance of the final part.
  5. Reliable release agents lead to nearly zero wear and maintenance costs in the long term.
  6. Provides uniform results throughout the entire process.

Overview of Common Injection Molding Defects and Solutions

Injection molding defects may affect both the appearance and functionality of the parts. To restore, extra work increases the production costs. Besides, defects also increase rejection rates. Therefore, understanding these defects is crucial. You must know what causes them and how to prevent them.

Defect Common Cause Solutions
Flow Lines Low melt temperature, slow injection speed, inconsistent cooling Increase melt/mold temperature, optimize injection speed, redesign gate location
Sink Marks Uneven wall thickness, insufficient packing pressure, improper cooling Increase holding pressure/time, redesign part thickness, improve cooling
Surface Delamination Material contamination, moisture, incompatible additives Use clean and dry material, improve material compatibility, and optimize processing temperature
Weld Lines Multiple flow fronts meeting, low temperature, poor venting Increase injection speed and temperature, improve venting, and reposition gates
Short Shots Insufficient material flow, low pressure, blocked gates Increase injection pressure/temperature, enlarge gates, improve venting
Warping / Warpage Uneven cooling, residual stress, inconsistent shrinkage Inconsistent shrinkage; Optimize the cooling system, ensure uniform wall thickness, and adjust the mold temperature
Jetting Excessive injection speed, poor gate design Reduce injection speed, modify gate size or location
Flash Excessive injection pressure, mold misalignment, and worn mold Reduce pressure, improve clamping force, and repair mold surfaces
Burn Marks Trapped air, excessive temperature, poor venting Improve venting, lower melt temperature, and reduce injection speed
Splay Marks Moisture in material, trapped gas, and resin degradation Dry material properly, optimize temperature, improve venting
Voids & Bubbles Trapped air, thick sections, uneven cooling Increase packing pressure, redesign thick sections, improve cooling consistency
Gate Vestige Poor gate trimming, improper gate design Optimize gate type/location, improve trimming process, and adjust molding conditions

Flow Lines

Flow lines in injection molding may appear as wavy, off-color, or band-like streaks on the surface. Generally, flow line parts appear slightly different in color from other places. In most cases, they appear on a narrow section of the item.

Causes:

  1. Melt, or Mold Temperatures are too low. When causing solidification, flow lines may appear.
  2. Slow filling may allow the plastic to cool before the mold is full.
  3. When you place the gates improperly, it may create higher shear, friction, and uneven flow. Eventually, it causes flow lines.
  4. When you drastically change the wall thickness, it may cause uneven cooling rates. As a result, flow lines may appear.
  5. When there are obstructions in the mold, the flow front may stall. As a result, a flow line may appear.

Solutions:

  1. You can reduce flow-line defects by adjusting process parameters. Try increasing the injection speed, temperature, and pressure.
  2. Try to optimize the mold design. In this case, pay special attention to venting, gate size, and fillets.
  3. You can also try increasing the nozzle diameter and ensuring proper material drying.

Sink Marks

Sink marks are small indentations on the surface of molded parts. Generally, these marks come on the thicker sections of the parts. They form when the outer layer solidifies, and the inside layer shrinks during cooling.

Causes:

  1. Large wall thickness leads to uneven cooling and shrinkage.
  2. Low holding pressure doesn’t compensate for shrinking.
  3. A too-small gate may also restrict smooth material flow.

Solutions:

  1. You may increase holding pressure and cooling time to avoid shrinkage.
  2. Try to reduce wall thickness while making it functional.

Surface Delamination

Surface delamination is a type of peeling or flaking from the surface of a molded part. After separation, it looks like another sheet of the part. Consequently, it weakens the material structurally and degrades the finish and appearance.

Causes:

  1. During processing, contaminated resin materials may mix.
  2. Excessive moisture in resin leads to surface delamination.
  3. Incompatible plastic polymer blending can be a strong reason.

Solutions:

  1. Avoid mixing incompatible materials.
  2. Dry the resin according to the instructions.
  3. Always clean the injection hopper.

Weld Lines

Weld lines are visible surface markings that result from two or more flowing fronts. They form where two flow fronts meet. It results in weaker physical spots.

Causes:

  1. Low melting point leads to this issue.
  2. Slower plastic injection speed during the process.
  3. Relatively poor gate position design.

Solutions:

  1. Enhance the mold and melt temperature for smooth flow.
  2. Increase the injection speed and optimize the gate position design.  

Short Shots

Short shots occur especially when your molten plastic fails to fill the mold cavity properly. Generally, at that moment, parts come out with imperfections and missing parts, such as edges.

Causes:

  1. When the plastic shot size is lower than the requirement.
  2. Insufficient injection molding pressure.
  3. Trapped air often disrupts material flow, leading to incomplete filling.

Solutions:

  1. Raise the shot volume for production.
  2. Increase the pressure limit and clear the vents properly.

Warping/Warpage

Warping, also known as warpage, is the twisting or the distortion of a molded part after ejection. As a result, the part loses its exact shape and strength. It is caused by uneven shrinkage or cooling inside the mold.

Causes:

  1. Uneven cooling that shrinks the part severely, causing it to bend.
  2. Applying a massive amount of injection holding pressure.
  3. Besides, high internal residual stress can also affect molding by warping.

Solutions:

  1. Make sure to maintain a uniform cooling temperature along the production line.
  2. Optimize design with proper wall thickness.
  3. Try to lower the holding pressure.

Jetting

Jetting is more like entering into the cavity with a wavy form or snake-like pattern. Molten plastic enters the cavity without touching the walls or filling smoothly. It solidifies quickly before even packing, causing weak spots and an incomplete design.

Causes:

  1. Using high-speed force to fill the cavity enables the jetting.
  2. Utilizing a narrow gate dimension for molten materials.
  3. The low melting point of the polymer.

Solutions:

  1. Minimize the initial injection speed.
  2. Enlarge the gate dimensions to ensure smooth flow.
  3. Raise the melt temperature.

Flash

Flash is an excess of plastic material. It escapes the mold cavity beyond the mold parting line. You can see it in the parting or ejector pins. It adds extra materials for parts that need extra trimming.

Causes:

  1. Providing excessive injection mold filling pressure.
  2. Insufficient metal clamping force allows halves to separate.
  3. Using a damage component that creates an escape way for the material.

Solutions:

  1. Increase the machine clamping force.
  2. Lower the speed and injection molding pressure.
  3. Use fully functional, high-quality components for each production.

Burn Marks

Burn marks look brown or dark. Typically, this discoloration occurs on the surface of the molded part near the end of the flow path.

Causes:

  1. Trapped air compresses quickly or overheats and burns.
  2. Using rapid injection to feel speed.

Solutions:

  1. Try to clean out the mold vents to let trapped air escape.
  2. Minimize the injection speed at a moderate level that suits the process.
  3. Reduce the melt temperature to stop material degradation.

Splay Marks

Splay marks are silver or silver streaks. Generally, it comes to the surface of the molded part on flow lines. These imperfections appear from trapped moisture or gases that escape from the plastic material flow.

Causes:

  1. A common reason is moisture in the resin or undried resin.
  2. Gas from material breakdown leaves silver streaks.
  3. Trapped air during feeding.

Solutions:

  1. Dry out the resin before processing.
  2. Minimize the melting temperature to avoid resin degradation.
  3. Lower the injection speed to reduce gas formation.

Voids & Bubbles

Voids are usually air pockets that remain within the thick walls of molded parts. These air pockets are invisible from the outside. They weaken the parts’ structure and are mostly found in thick sections.

Causes:

  1. Using less pressure that does not hold plastics tightly.
  2. Wet raw resin materials.
  3. Thick wall part designs.

Solutions:

  1. Dry all materials thoroughly before molding.
  2. Try to make thicker sections thinner or hollow.
  3. Increase the holding injection pressure.

Gate Vestige

Gate vestige is the excess material left behind on the surface. You may witness this excess material after ejection, which also stays at the gate location. It affects the product’s appearance and the assembly line.

Causes:

  1. Generally, when the gate is large, too much material can remain after separation.
  2. Applying improper gate trimming settings.
  3. Poor gate design can also make it hard to clean properly.

Solutions:

  1. Make the gate design relatively small so that no material is left behind.
  2. Adjust the automatic gate shearing.
  3. Redesign your gate for better functionality and to leave fewer marks.

How Mold Release Agents Prevent These Defects

Using RA is a versatile solution to prevent many injection molding defects. Specifically, you can solve most surface-related defects. Besides, when you use it as an internal ingredient of the mold mix, it also solves flow and release-related problems. As you know, the mold release agents create a thin barrier between the mold surface and molten plastic. This barrier generally reduces sticking, friction, and surface damage during ejection.

pvc workpiece

(1) Specifically, RA helps a lot by reducing flow lines, flash, burn marks, splay marks, and gate vestiges. It improves the material flow and ensures cleaner mold release.

(2) Mold release agents reduce stress during ejection. Thus, it also prevents surface delamination problems.

(3) For warping and sink marks, RA supports more consistent cooling and reduces internal stress.

(4) RA also improves resin flow inside the cavity. In some cases, it helps minimize short shots and weld lines.

Summary

Injection molding defects are not unusual. However, it becomes unacceptable when you do not know how they occur and how to prevent them. If you want to maintain the quality of plastic parts, understanding these key factors is extremely important. In this article, we discussed common injection molding defects. We have also explained how these defects occur and how to solve them.

Using mold release agents can significantly reduce many of these defects. Different types of mold release agents are used for different plastic materials. If you are interested, please contact our customer support today.

The post Common Injection Molding Defects and Solutions appeared first on AMINO.

]]>
Semi Permanent VS Sacrificial Release Agent: Key Differences for Industrial Applications https://aminoreleaseagent.com/blog/semi-permanent-vs-sacrificial-release-agent-key-differences-for-industrial-applications/ Thu, 30 Apr 2026 09:28:25 +0000 https://aminoreleaseagent.com/?p=4212 Choosing the right mold release agents is crucial to ensure high-quality parts. In this “Semi-permanent vs. Sacrificial Mold Release Agents” comparative guide, we will try to find out the pros and cons of each type. Both types have water-based and solvent-based versions. However, there are safety concerns with solvent-based versions. Therefore, we recommend that you [...]

The post Semi Permanent VS Sacrificial Release Agent: Key Differences for Industrial Applications appeared first on AMINO.

]]>
Choosing the right mold release agents is crucial to ensure high-quality parts. In this “Semi-permanent vs. Sacrificial Mold Release Agents” comparative guide, we will try to find out the pros and cons of each type. Both types have water-based and solvent-based versions. However, there are safety concerns with solvent-based versions. Therefore, we recommend that you understand how each type of release agent works before you jump into the main production.

What is Semi-Permanent Mold Release Agent?

One of the most common types of release agents is the semi-permanent version. Like other release agents, it also helps in removing parts from the mold easily. However, what makes it different is its properties and place of use. Unlike regular release agents, it doesn’t wear off quickly nor stick to the part. It creates a semi-permanent layer between the mold and the molding part. As a result, you can create parts multiple times, reducing per-part cost and increasing production speed.

The core materials used in this chemical are silicone, fluoropolymers, and wax or oil-based additives. These materials primarily ensure the RA adheres to the mold over multiple cycles. It doesn’t transfer to the part.

rubber mold release agent mk 103x

To use this release agent, first clean the mold. Make sure it is free of dust and old coatings. Next, apply the thin layer of the semi-permanent release agent. In this case, you can either use a spray or wipe the agent onto the mold. Then allow it to dry or, if needed, cure. Some agents need a few minutes to settle, while others may need heat to be applied to activate. Once done, start molding.

When applying the semi-permanent mold release agent, you must pay attention to a few factors.

(1) The layer thickness must be appropriate and thin for better results. Follow the manufacturer’s guidelines to ensure the desired layer thickness.

(2) The working temperature is crucial here. Check that the release agent works with the molding temperature.

(3) The type of release agents must align with or be compatible with the molded part material.

(4) Always ensure a clean mold surface to improve the adhesion and part finish.

(5) Choose the correct way of applying the release agent.

Advantages of Semi-permanent Mold Release Agent

Unlike other types of mold release agents, semi-permanent agents offer unique benefits. These pros make the chemical ideal for many applications.

(1) One of the crucial benefits of a semi-permanent mold release agent is its durability. It can last a long time. You can use it 4 to 30 times, or even more, depending on the type of RA you have. As a result, you can save time and material compared to other RAs.

(2) A semi-permanent mold release agent can be applied very quickly. You can either use the spray or the regular wiping method. As a result, you can ensure the preparation process is faster and easier for workers.

(3) These release agents can improve the appearance of molded parts. It can give the part surface a nice gloss or shine. As a result, it may reduce the need for extra polishing or finishing steps.

(4) Semi-permanent mold release agents can also handle high temperatures. The use of silicone in the composition allows it to operate up to 400 degrees Celsius. As a result, you can typically handle a wide range of plastics and resins.

(5) Semi-permanent release agents come with a wide range of different formulas. You can also customize it to your project’s needs. Some types focus on extra gloss, others on smoother release.

Limitations of Semi-permanent Mold Release Agent

Although semi-permanent mold release agents offer many benefits, it still has some limitations. You must consider both pros and cons to decide the best choice for your project.

(1) If you are a beginner or not sure about the right amount to use, things may go wrong. If you have applied too much, it can leave residue on parts. As a result, you may see defects in paint or glue.

(2) Unlike other RA, the semi-permanent release agent must be applied in the correct amount. This requires proper user training.

(3) Some complex or very rough molds may not bond well with the agent. As a result, it may make the parts stick.

(4) Semi-permanent mold release agents cost more than regular ones.

What is Sacrificial Mold Release Agent?

A sacrificial mold release agent is another popular type. It is also used in molding applications to ensure smooth part removal. As you know, semi-permanent mold release agent remains on the mold surface after the part removal for multiple cycles. However, sacrificial mold release agents do not stick to the mold. Rather, it comes off as part of the name, so the name is called “sacrificed.” So, you should reapply the release agents before making the next part.

Sacrificial release agents are often used for large items. You can also say that one-of-a-kind parts often use these RA. Besides, when the mold surface is rough or has some flaws, using Sacrificial RA helps a lot.

The elements used for this RA are paste waxes, PVA, silicone oils, and other wax or liquid blends. PVA typically forms a thin, protective layer. On the other hand, silicone oils reduce friction and facilitate part release. Other wax or liquid blends may improve gloss and coverage.

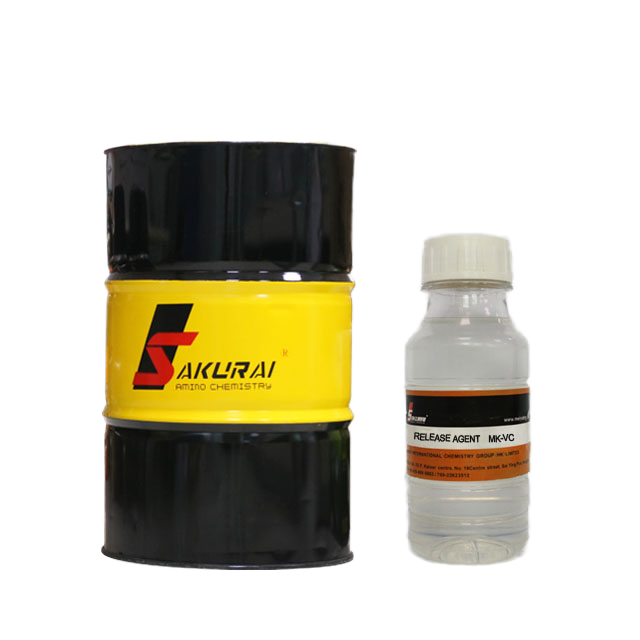
mold release agent mk-vc

To use sacrificial release agents, first clean the mold. Try to ensure the mold is completely clean. Remove the dirt, dust, or old coatings from it. Then, apply the agent gently. You can use various methods, such as spreading, wiping, or spraying, to cover the mold surface evenly. Later, check the coverage simply by identifying the visual signs.

Critical Factors to Consider

When using sacrificial mold release agents, you must also consider several critical factors. First, you must ensure even application, or it can cause sticking or defects. Second, this RA works best on clean molds. If it has a rough surface, it may benefit from a wax filling to fill imperfections. Third, pay attention to the temperature; it must be suitable for the molding process, ranging from cold to hot. Finally, this RA is ideal for large, low-volume, or custom parts.

Advantages of Sacrificial Mold Release Agents

Sacrificial Mold Release Agents also offer a wide range of benefits compared to semi-permanent RA. These benefits make them ideal for specific applications.

(1) One of the greatest benefits of this RA is its cost. Sacrificial mold release agents are cheaper than semi-permanent ones. As a result, it is a good choice for small or custom parts.

(2) Sacrificial mold release agent is easier to use. You don’t need special training to get good results. All that matters is reducing mistakes and speeding up preparation. You can see a thin haze or shine on the mold to confirm whether it is done correctly.

(3) Some sacrificial agents can make your parts shinier and smoother. As a result, it reduces the need for extra polishing.

(4) Sacrificial mold release agents are suitable for both cold and hot molds. This flexibility typically makes them useful for different plastics and resins.

(5) Sacrificial mold release agents are good for rough surfaces. It fills small flaws, cracks, or uneven gel coats. As a result, it helps make the final part smooth and consistent.

Limitations of Sacrificial Mold Release Agents

Sacrificial mold release agents also have several limitations to check. That’s where the other types of release agents come in handy.

(1) Sacrificial mold release agents wear off completely when the part is removed. You must coat the mold again for each new part.

(2) Sacrificial mold release agents stick to the part surface during release. As a result, it may interfere with painting, gluing, or other finishing processes.

(3) Since you must reapply it every time the part is removed, the production speed becomes slower. High-volume operations may find it inefficient. As a result, it is not ideal for high-volume runs.

(4) If you apply too much wax or PVA, it may cause uneven layers. As a result, it may lead to defects or irregular surface finishes.

Semi-Permanent vs. Sacrificial Mold Release Agent: Safety Considerations

Modern semi-permanent mold release agent is generally safe to use. Many are now water-based, which reduces harmful fumes compared to older solvent-based versions. However, you must still ensure proper ventilation during the process. Besides, your workers must wear gloves and eye protection during use.

On the other hand, sacrificial mold release agents are usually low in toxicity. They are typically simple to handle and do not need special equipment. However, you must still care to avoid inhaling powders. Fumes may still happen if you heat wax.

Semi-Permanent vs. Sacrificial Mold Release Agent: Which is Best?

Mold release agents are essential in molding. Without it, you can not remove the part smoothly or ensure a high-quality finished part. However, choosing the right mold release agents is the most critical part here. Well, it all depends on your project needs, especially what materials you are working with. In this case, understanding the RA is the first step to making the decision.

In this “Semi-permanent vs. Sacrificial Mold Release Agents” comparative guide, you have learned all the foundational knowledge about these two release agents. You know their pros and cons. You also know the critical factors to consider when applying them.

Semi-permanent options are ideal for high-volume or precision molding. In this case, water-based versions improve safety and reduce environmental impact. On the other hand, sacrificial mold release agents are cheaper and simpler to use. It is especially ideal for custom and large parts.

Both release agent types need proper applications, clean molds, and protective measures for safety. If you have any questions, feel free to reach out to our customer support team.

The post Semi Permanent VS Sacrificial Release Agent: Key Differences for Industrial Applications appeared first on AMINO.

]]>
PVA Release Agent for Composite Manufacturing: Complete Guide https://aminoreleaseagent.com/blog/pva-release-agent-for-composite-manufacturing-complete-guide/ Tue, 21 Apr 2026 00:36:03 +0000 https://aminoreleaseagent.com/?p=4128 Composite molding is widely used to produce strong, lightweight components. You may think of the bumpers, body panels, and hoods on your car. Also, think about hulls and decks used in the marine industry. All these composite parts are produced through precision composite manufacturing. Here, the PVA release agent plays a crucial role. The use [...]

The post PVA Release Agent for Composite Manufacturing: Complete Guide appeared first on AMINO.

]]>
Composite molding is widely used to produce strong, lightweight components. You may think of the bumpers, body panels, and hoods on your car. Also, think about hulls and decks used in the marine industry. All these composite parts are produced through precision composite manufacturing. Here, the PVA release agent plays a crucial role.

The use of PVA mold release agent ensures a high-quality final product. When the composite is molded, removing it from the mold is tricky. Here, the PVA release agent allows smooth removal of the part from the mold. As a result, the use of this chemical prevents parts from sticking together, getting damaged, or losing their finish.

What is PVA release agent?

PVA release agent is a water-based liquid used in composite manufacturing. PVA stands for polyvinyl alcohol, which is a water-soluble synthetic polymer.

PVA RA primarily serves as a barrier between the mold and the molded part. It prevents the hot-molded material from contacting the mold surface. The barrier is so thin that it doesn’t affect the dimension. As a result, it prevents the molding material from sticking to the surface.

PVA mold release agent is one of the oldest and most reliable solutions. And it is widely used in composite manufacturing. When applying, first choose a suitable method. You may think of a spray gun, a brush, or a sponge. After applying, give it a while to dry. When it dries, water evaporates, forming a tough, sacrificial film. This film is crucial for complex molding.

PVA-release-agent

One unique thing about this RA is that it transforms the color when it dries on the surface. It slightly tints blue or green, which eventually helps you to see the coverage. It typically reduces the risk of costly damage.

Most manufacturers rely on this RA to ensure better production quality. It makes composite part separation easier. It is especially well-suited for handling fiberglass, resins, and carbon fibers.

Manufacturers rely on this mold to ensure better production quality and easier part separation. It’s a popular choice, especially when you are working with fiberglass, resins, and carbon fiber.

How do PVA release agents Work in Composite Manufacturing?

A PVA release agent works by forming a physical barrier on the mold surface. As the coating dries, water and alcohol evaporate on their own. Thus, it creates a thin, impermeable, plastic barrier. This film plays a prominent role in preventing resin from soaking into or contacting the surface. It typically acts as a shield.

Its chemical structure is highly efficient and heat- and solvent-resistant. Even during curing, it does not react with polyester or epoxy resins. When the part is ready, you can remove it from the mold. You may also clean off the mold surface with water.

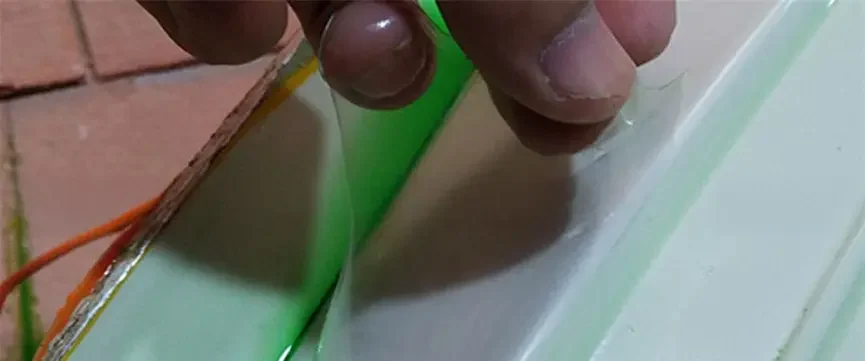
pva release agent film stripping

PVA vs Other Mold Release Agents

PVA mold release spray is one of the most affordable release agents. It is easy to apply and perfect for the open-mold process. In contrast to wax-based release agents, it may provide a high-gloss finish but is difficult to apply and requires time and preparation.  

Compared to semi-permanent release agents, PVA is cheaper. Semi-permanent agents last longer and are suitable for high-volume production. However, it is more difficult to clean than to remove PVA release agents. At the same time, semi-permanents are for rapid work. Many of the professionals use wax and PVA agents to ensure ultimate protection.

Why should you opt for PVA release agent?

There are several reasons to opt for PVA. However, the right choice still depends on what materials you are using. Also, even with composite materials, you must carefully choose the right grade of PVA RA.

Great Releasing Properties

PVA release agents have a strong release property. It acts as a barrier, preventing sticking. It typically prevents resin from bonding with the mold. Each part comes out with precise, smooth, and defect-free surfaces.

Reliable physical barrier

When you apply the liquid onto the mold surface, it dries into a tough, plastic-like skin. This layer can provide a physical barrier and strength that wax cannot match. It is usually an ideal solution for complex shapes where there is a high possibility of resin trapping.

Complete Resin Protection

PVA release agent provides complete protection against resin adhesion. It is chemically resistant to styrene and other harsh solvents. This type of protection is vital for the fine finishing of your tooling.

Versatile Solution

Polyvinyl alcohol release agents are versatile and support working with polyester, epoxy resin, and vinyl ester. This agent is also suitable for a wide range of industry applications. Examples include marine, automotive, and aerospace, among others. You may also apply it using a brush, a spray, or a wipe.

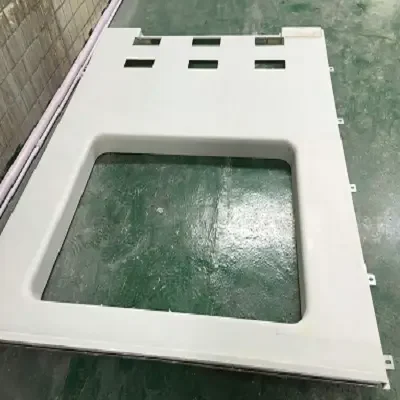
finished composite part

Support Water Cleanup

PVA clean-up after production is quite easy and fast. Besides, it is an eco-friendly solution for every manufacturing industry. Since the agent is water-soluble, you only need warm water to wash the mold off the surface for product removal. It eliminates the need for harsh chemicals or scrubbing.

Necessary Tools and preparation before molding

Before applying the mold release agent, it is necessary to arrange all the necessary tools. We can classify these tools into three main categories.

Application tools

You need to have all the required tools ready before starting the process. Using the right tools also ensures a professional finish. In this process, you will need a soft brush, a spray gun, and a clean cloth. If you are working with small molds, microfibers, or sponges, it works best. Make these items present beforehand.

Surface cleaning

The molds must be cleaned and free of dust before you begin. Therefore, you must prepare the surface. You can use a dedicated cleaner or isopropyl alcohol for the surface. Molds are sensitive because even a fingerprint can create a hole or agent to bead up.

Environmental control

Conduct the process in a controlled, dust-free environment. Ensure a good ventilation system is in place. Keep the temperature between 20°C and 30°C for optimal outcome. Avoid humid areas, as they can slow production.

Masking Tape

Always use high-quality masking tape to protect the mold’s edges. This step prevents PVA release agents and resin from spilling onto non-targeted areas. Clean, taped edges make wedges simpler to insert and remove without harm.

Step-by-step Application Guide

Once all the tools are prepared, prepare yourself for your step-by-step application process. If you are a beginner, we recommend following the manufacturer’s guidelines. Do it in a controlled environment to avoid contamination.

Prepare the mold

Make sure the mold is properly ready before use. Remove dust and oil from the surface. You may use either a lint-free cloth or a specialized cleaner. After cleaning, make sure it is dry and place it in a stable, temperature-controlled area.

Apply Mold wax and Release Agent

Now, apply high-quality mold wax and buff it to a shine. Apply it for 2-3 layers. Once the layer is cured properly, apply PVA release agent. Use a spray or wiping method and a stroke for total coverage. This dual-layer method makes it a reliable solution for preventing sticking.  

Allow layer-by-layer drying

Let the layers dry one at a time. Wait until each layer dries completely before applying another. It typically takes 15 to 30 minutes, depending on the humidity level. Each film should be track-free and smooth.

Laminate

Once the layer is dry, the mold is now ready for the lamination process. You can apply gelcoats or resin onto the surface. Thus, the material would take shape, and the layer would separate it from the surface.

Post-Molding Guide

Once molding is done, there are also standard ways to perform post-molding activities. You must use standard tools to remove the molded part from the mold. If you do it incorrectly, you could damage the part.

Carefully remove the product

Make sure the resin is fully cured. Gently flex the mold edges to break the seal. Use a plastic wedge or compressed air to lift the molded product. Start from the edges.

Remove PVA residue

As you know, the PVA release agent is water-soluble. So, you need to rinse the part with warm water. Here, you can use a soft cloth to wipe the film off. The part should be free of PVA residues before finishing.

Inspect the Mold and Product

After separation, inspect the finished part for any defects or bubbles. Also, check for any scratches or resin buildup in the mold. Ensuring both are in high-quality condition extends the lifespan of both mold and product.

Clean and Re-prepare for the next run

Wipe the surface clean and remove any residues. Now apply fresh wax coats to the mold, if necessary. After drying, it is now ready for your next production runs.

Conclusion

For composite materials, the PVA mold release agent plays a crucial role in demolding. It helps create a clean barrier between the mold and the material. As a result, it ensures easy part removal and protects the mold surface.

The release agent alone cannot ensure a high-quality product. You also must do it right. This way, you can ensure the highest product quality and reduce defects.

PVA release agent is ideal for many composite materials, including fiberglass, epoxy, and carbon fiber.

If you are looking for high-quality PVA release agents, consider Amino. The company produces a wide range of mold release agents for different materials. Contact us for more information.

The post PVA Release Agent for Composite Manufacturing: Complete Guide appeared first on AMINO.

]]>
The Ultimate Guide to Composite Release Agents https://aminoreleaseagent.com/blog/the-ultimate-guide-to-composite-release-agents/ Thu, 02 Apr 2026 06:40:10 +0000 https://aminoreleaseagent.com/?p=4121 Today, composites are one of the most widely used materials in injection molding. However, working with them is not as simple as with other materials. Why? The reason lies in their sticky nature, which makes them prone to sticking to the mold. To resolve this issue, composite release agents come into the scene. However, many [...]

The post The Ultimate Guide to Composite Release Agents appeared first on AMINO.

]]>
Today, composites are one of the most widely used materials in injection molding. However, working with them is not as simple as with other materials. Why? The reason lies in their sticky nature, which makes them prone to sticking to the mold. To resolve this issue, composite release agents come into the scene. However, many don’t completely understand them. That’s where this ultimate guide to composite release agents will help.

Remember, if a material sticks to the mold during injection molding, it can later cause serious problems. For example, the final products will have serious defects and perform poorly. That’s why manufacturers rely on release agents. But if you are new to this term, it might feel confusing. But worry not! In this guide, I will explain everything about composite release agents. So let’s get started.

What Is a Composite Release Agent?

Before starting anything, let’s first understand the composite release agents.

A composite release agent is a special substance used in molding. It is applied to a mold surface to stop composite materials from sticking to it. Basically, the agent creates a thin, protective layer between the mold and the final product. As a result, it becomes easier to remove the composite part once it has cured.

composite release agent

In simple terms, a release agent acts as a separator between the mold and the material. Actually, when you make a composite product through injection molding, you pour a liquid resin into the mold. However, a composite naturally forms a tight bond with any surface it contacts.

That’s why, during curing, it also forms a bond to the mold surface. That’s why manufacturers apply a layer of release agent before pouring the composite resin. Without a release agent, it would be almost impossible to remove the final product. It reduces surface adhesion and prevents chemical bonding between the mold and the composite.

Why Are Release Agents Important?

From the above section, you can see that composite release agents are very crucial in composite manufacturing. Without them, the whole process can become difficult, messy, and expensive. But that’s not all. Let’s find out more reasons that make the release agents stand out.

  • Easy & Safe Removal: As I mentioned above, composite materials adhere tightly to the mold when they harden. That’s why it becomes very difficult to remove and causes defects in the final parts. However, the layer of these agents acts as a separator, preventing them from sticking.
  • Protect the Mold from Damage: As you know, molds are very expensive. They need to be used many times. However, if the composite sticks to the mold, it will be damaged if you force it out. That’s why the release agent reduces direct contact and protects the mold from damage.
  • Saves Time & Reduces Effort: When a part sticks to the mold, it takes extra time and effort to remove it. Sometimes, you may even need to redo the whole process if the part gets damaged. All this wastes your time and requires effort. However, a release agent prevents all this by making part removal easier and faster.
  • Reduces Material Waste & Cost: Suppose a composite part sticks tightly to the mold. When you try to remove it forcefully, the part may be damaged. This material will be wasted, increasing the overall cost. However, a release agent makes it very easy to remove the part, reducing material damage and waste. 

Types of Composite Release Agents

After understanding the basics of release agents, you should know that they come in various forms. All of those have their own features, benefits, and limitations. Before you get started, it is crucial to understand the main types of composite release agents to choose the best one.

1- Wax-Based Release Agents

The most commonly used and traditional type of composite release agent is a wax-based one. As the name suggests, this release agent is made from a special wax. When you apply its layer to the mold, it fills the mold’s tiny pores and smooths its surface. After curing, it forms a shiny, non-sticky layer that entirely prevents the composite material from seeping.

What further makes the wax release agents is their non-reactive nature. It does not chemically react with composite or mold, but acts as a physical barrier. So you don’t have to worry about changes to your final part’s properties. But remember, wax-based release agents form a very thin layer that wears out quickly. That’s why you must apply multiple layers of this release agent to make it strong. 

2- PVA (Polyvinyl Alcohol) Release Agents

The second type is liquid, water-based PVA release agents. Unlike wax, PVA does not stay invisible. Instead, it dries into a light, plastic-like layer that you can often see. So, to apply it, first spray the PVA release agent onto the mold surface.

PVA-release-agent

After that, apply UV light and let it dry. Once dried, PVA forms a strong and durable protective layer. Now, when you pour a composite into the mold, this layer will act as a barrier, preventing it from sticking. The best thing about the PVA release agent is its reusability. Once you remove the final product, you can wash it with water and use it for at least the next composite part.

3- Semi-Permanent Release Agents

A semi-permanent release agent is one of the most advanced types, often used in the professional making of composites. What makes this type unique is that it forms a chemical bond with mold but a physical bond with the composite. Let me explain it. Actually, these release agents are made from special materials, such as fluoropolymers.

These materials, when applied to the mold, form a chemical bond with the mold surface. That’s why you don’t have to reapply the release agent over and over; it stays part of the mold. On curing, it forms a non-sticky layer that acts as a physical barrier with the composite you pour. The composite material does not stick to the mold, and the parts come out smoothly with less effort.

4- Water-Based Release Agents

Another eco-friendly, safe, and easy-to-use option in release agents is water-based release agents. As you can see, all the above types are made with harmful chemicals that are difficult to handle. However, this release agent type is made with water-soluble polymers or resins. When you apply it to the mold surface, the water evaporates, forming thin protective layers.

This layer acts as a physical barrier, preventing the composite from sticking to the mold. Also, after its removal, you can easily wash it away from the mold with water. But remember, these release agents form very thin layers. This layer cannot withstand high temperatures. That’s why you have to be very careful to prevent the composite from seeping into the mold. To avoid this, always apply multiple layers and test before major production.

5- Solvent-Based Release Agents

Solvent-based release agents are a special type made with chemical solvents, i.e., organic solvents. You might know that the release agents generally contain active ingredients. These ingredients actually prevent the composite from sticking. So it is the chemical solvent that quickly dissolves those active ingredients.

During drying, the solvent evaporates, leaving behind a thin layer. This layer now acts as a physical barrier, preventing the composite from sticking. But know that the solvent-based release agents release harmful fumes. That’s why, when applying them, always work in a well-ventilated area and wear a mask.

How to Apply Composite Release Agents: Step-by-Step Guide

Now you know how to use common composite release agents and their types. Right? Now, you must know that applying these agents correctly is very crucial. Even if you choose the right release agent, applying it incorrectly can cause composites to stick and damage the final part. So before you get started, here are the steps you must follow.

Step 1: Clean the Mold Thoroughly

First of all, you must do a deep cleaning of the mold before applying the composite release agent. Remember, if there is any residue, dust, oil, or anything else, the release agent will peel off. To prevent all this, use a soft cloth and mild detergent or a mold cleaner. After you are sure all residues are removed, wash it with water. After that, let the mold completely dry.

Step 2: Choose the Right Release Agent

As I said above, you will find several types of composite release agents in the market. Also, you know that all of those have different features. So you have to make an informed decision about the right release agent. For this, always keep your project’s requirements in mind. For example, if you are a beginner and working on small projects, wax-based or water-based agents are ideal. However, for complex molds, you can use PVA or a solvent-based release agent.

Step 3: Apply the Release Agent & Let It Dry

Now that you have chosen the release agents, the next step is to apply them. Generally, the application of the release agent mainly depends on its type and nature. Let’s suppose you are using wax or water-based release agents. In this case, you have to apply them with a soft cloth, rubbing in a thin, even layer. 

However, for semi-permanent or solvent-based release agents, you have to spray them to form a thin layer. Once applied, let it dry. If you pour the composite onto a wet release agent too quickly, its effectiveness will be ruined. On average, it takes about 30 minutes to dry a release agent. However, using the curing method can speed up this process. 

Step 4: Apply the Composite Material & Inspect

Now that the release agent is fully dried and ready, it’s time to pour the composite. When you apply the composite, you need to consider some things. For example, make sure that it sits on top of the release agent and does not touch the mold. Also, look for any leaks or patches. When all is set, let the release agent do its job. On curing the composite, you will be able to release it easily.

How to Choose the Right Release Agent for Composite?

Even if you know the types of release agents, several beginners still get confused about their selection, and that’s normal. Are you also one of them? If so, worry not! In this section, I will outline some factors to consider when choosing a release agent for your project.

  • Type of Mold: First, identify the type of mold you are using. Molds can be made from metal, silicone, fiberglass, or plastic. The release agent behaves differently with all of these mold materials. For example, PVA works well with molds like fiberglass. However, semi-permanent or solvent-based agents are better for metal molds. 
  • Production Volume: The number of parts you plan to make also affects your choice. If you are making a few parts, wax or water-based agents are usually sufficient. For repeated use or large-scale production, semi-permanent or solvent-based release agents are better.
  • Surface Finish Needed: The finish you want for your final product also matters. For instance, if you want a smooth, shiny finish, I suggest choosing a semi-permanent or solvent-based agent. However, for a standard or matte finish, you can use a wax or PVA release agent. 
  • Safety and Environment: Lastly, while choosing the release agent, also consider its safety and toxicity. Remember, solvent-based agents are very effective but can release harmful fumes. That’s why you choose them when you have a properly ventilated working space. However, water-based release agents are very eco-friendly. You can even work with them indoors. 

Conclusion

Composites are considered highly effective materials due to their additional properties. However, working with them during injection is not simple. Due to their bond-forming nature, they can stick to the mold. When you try to remove the composite part, it can get damaged. To resolve this issue, release agents play a key role.

These are specialized substances that create barriers between mold and composite material. As a result, they prevent the composite from sticking and make its removal easier. You will come across several types of release agents. However, choosing the right one and applying it correctly is the key.

The post The Ultimate Guide to Composite Release Agents appeared first on AMINO.

]]>
Mold Release Spray VS Mold Release Wax: Which Is Better for Industrial Applications? https://aminoreleaseagent.com/blog/mold-release-spray-vs-mold-release-wax-which-is-better-for-industrial-applications/ Mon, 09 Feb 2026 08:03:10 +0000 https://aminoreleaseagent.com/?p=4104 Molding thermoplastics or elastomers allows us to produce a wide range of product shapes. It plays a key role in the manufacturing of everyday items. From plastic housings to auto parts to electronics, medical devices, and consumer goods, molding is needed. These products are produced repeatedly at large volumes. To ensure smooth production, every molding [...]

The post Mold Release Spray VS Mold Release Wax: Which Is Better for Industrial Applications? appeared first on AMINO.

]]>
Molding thermoplastics or elastomers allows us to produce a wide range of product shapes. It plays a key role in the manufacturing of everyday items. From plastic housings to auto parts to electronics, medical devices, and consumer goods, molding is needed. These products are produced repeatedly at large volumes. To ensure smooth production, every molding process must use the best mold release.

A high-quality mold release agent allows parts to separate cleanly from the mold. It mainly reduces defects and shortens the cycle times. However, when you try to choose the right mold release for your project, you end up getting too many choices. The two most common types are spray and wax.

This article will guide you to the fundamentals of these two types of mold release. You will learn how they work and their specific applications.

mold release agent application process

Understanding Mold Release Agent

A mold release agent helps molded parts release smoothly and easily. In simple terms, it creates a barrier between the mold and the molded part. Thus, it prevents two materials from sticking. Without it, both the mold and the product can be ruined during separation.

Its common types include spray, wax, liquid, semi-permanent, and others. Each type suits particular applications and materials due to its manufacturing elements. Based on their uses, choose the right one for your application.

What is Mold Release Spray?

Mold release spray is a chemical substance preserved in an aerosol can. It typically forms a thin, slippery film between the mold and the casting material. You simply have to spray it onto the mold and make sure it covers the entire area. This spray method is suitable for complex shapes and works well on plastic, rubber, and resin.

mold release spray

Benefits of Mold Release Spray

Rapid and Easy Applications

Spray release agent is all about saving time. You just have to point the nozzle at the mold and spray uniformly. Coating completes in seconds. There is no need for messy rags or tiring hand-buffing. The coating also dries instantly, so you can pour it right away, making it suitable for mass production.

Excellent for Complex Geometries

This spray reaches every place where wax cannot reach. The fine mist penetrates deep cracks, sharp undercuts, and tiny textures easily. As the coating is so thin, it does not even miss a single delicate feature of the design. Every tiny detail is filled and protected. This is why manufacturers prefer it for intricate shapes.

Consistent Quality and Finish

Quality is the main priority of mold release spray. Using this agent reduces the physical force needed to remove parts. Stretching and tearing are automatically minimized, leading to even longer mold life. This way, you get a smooth, glossy finish every time after pouring.

Limitations of Mold Release Spray

Surface Contamination

The spray creates a fine mist that travels through the air. This invisible film can land on the workbench and tool. It minimizes the chance of paint, glue, and tape sticking to surfaces. Even a tiny drop can ruin the entire finish.

Chemical Sensitivity

Some sprays contain harsh chemicals that might damage casting material. For example, certain aerosols may dissolve styrofoam or cause silicone molds to swell. So, make sure to check whether the agent is compatible with your resin.

Less Effective Long-Term Production

A mold release spray is less effective for long-run production. Sprays are a “one-time” coating that comes off with the production. It means you have to reapply after every extraction. This approach is hectic for manufacturers. Also, for making hundreds of parts, re-spraying can be expensive and time-consuming.

What is Mold Release Wax?

mold release wax is a thick paste used to prevent parts from sticking to the mold. This agent is typically made of carnauba and synthetic polymers. Operators apply it with a cloth, then buff it to a shine. It generally creates a strong barrier. The agent is perfect for professional finishes and is reliable for high-quality projects.

mold release wax

Benefits of Mold Release Wax

Superior Surface Quality

The best mold release agent for professional work is mold release wax. Hand buffing creates a smooth surface, avoiding “orange peel”. While sprays may leave visible textures. Finished parts come out looking shiny and polished, often requiring no post-processing.

Long-Lasting Protection

Wax creates strong, durable barriers. It stays intact even if it produces 2-3 parts. So, once you apply the agent with several coats, it lasts for multiple cycles, allowing you to extract many parts. Consequently, it saves both time and money in the long run.

Precise and Controlled Application

Since you apply mold release wax with a cloth, it only reaches the places where you want. It does not contain fine mists to be worried about. You can simply keep it away from areas that need to be glued or painted later. As a result, this agent becomes an effective option for small to crowded workshops.

Limitations of Mold Release Wax

Time-Consuming Application

Applying wax requires lots of patience. It takes a longer time to complete the entire process. First, rub it on, let it dry until it hazes, and then buff it off. But for a new mold, you may need to repeat the cycle a few times.

Physical Effort and Fatigue

Waxing is hard. It takes physical strength to polish the surface and make it shine. When you are working on large boat hulls and large tables, your arms will get tired easily. This continuous scrubbing can be draining for users.

Challenges with Complex Geometry

Wax is a thick paste that is hard to use for complex designs. It is nearly impossible to fill all the tiny details using a cloth. On the other hand, if it builds up, it may clog up the fine details. It makes the release wax a poor choice for detailed work.

Mold Release Spray vs Mold Release Wax: Which is Better for Your Application?

To choose the best mold release agent between wax and spray, first understand your application needs. Both serve better in their specific application. Understanding their suitability helps you avoid costly expenses.

Application Method

Sprays are really fast and can reach deep cracks and hard-to-reach details with a fine mist. For this reason, this agent is ideal for 3D-printed or highly textured molds. In contrast, wax is a paste applied with a cloth. It requires physical buffing and is perfect for curved surfaces.

Production Volume

Sprays support fast-paced production. It allows you to coat multiple molds in a few seconds. Therefore, it is fit for small to massive production needs and is used for indoor purposes. Wax is ideal for small-scale projects that require high-quality products and is used for outdoor applications. It takes longer at the start, but the results are more stable for large, expensive industrial molds.

Surface Finish

In terms of surface finish, mold release spray is less effective than wax. Sprays are likely to leave “orange peel”, which may require further finishing steps. Contrarily, wax offers a premium finish. It is the gold standard for fiberglass and marine parts.

Durability & Reapplication Cycles

Wax is durable and strong and can last for a long time. After making several coats, you can produce many parts without re-waxing on the same mold. Sprays are sacrificial, meaning the layer can come out with the part during extraction. Consequently, you must reapply the spray agent after each use or after a single pour.

Impact on Later Operations

A mold release agent spray has later effects. During spraying, it produces a film nearby, which affects the adhesion of paint and glue. But wax is more controlled. So, if your part requires painting or secondary bonding, wax can be a safer option.

Cost and Efficiency

Sprays have a higher initial investment than wax. While sprays save time. reducing labor costs. Wax is inexpensive to buy and lasts for many productions. However, it increases the time and labor costs for each mold setup due to manual work.

Environmental and Safety Factors

One of the best mold release agents can be selected based on eco-friendliness and safety. Spray mold release agent is toxic, flammable, and can cause allergic reactions in sensitive individuals. Wax contains lower in volatile organic compounds VOCs. However, both require proper ventilation, skin protection, and safety measures to ensure a healthy workspace.

Conclusion

Both mold release spray and mold release wax are widely used in molding applications. However, their purposes and applications are different.

Mold release spray is suitable for fast production and complex mold structures. It is easy to apply and suitable for high-volume manufacturing. On the other hand, mold release wax is much better for surface finish and mold conditioning. You can choose it for low-volume production.

There is no single solution for every process. Therefore, you must choose the best mold release for your project, which depends on several factors. You have to consider production volume, mold design, and finishing requirements. The best mold release will improve efficiency, product quality, and mold lifespan.

If you have any questions, feel free to reach out to our customer support team. The AMINO team is always ready to help you with regular or customized solutions.

The post Mold Release Spray VS Mold Release Wax: Which Is Better for Industrial Applications? appeared first on AMINO.

]]>
Mold Release Agent Manufacturing Process https://aminoreleaseagent.com/blog/mold-release-agent-manufacturing-process/ Mon, 09 Feb 2026 06:09:47 +0000 https://aminoreleaseagent.com/?p=4092 A single failed demolding can ruin a thousand-dollar mold. It may also ruin hours of production time. That’s why the chemistry behind release agents matters. If you are looking for a reliable mold release agent manufacturing factory, understanding the process is crucial. Casting and molding are among the most popular techniques for making metal and [...]

The post Mold Release Agent Manufacturing Process appeared first on AMINO.

]]>
A single failed demolding can ruin a thousand-dollar mold. It may also ruin hours of production time. That’s why the chemistry behind release agents matters. If you are looking for a reliable mold release agent manufacturing factory, understanding the process is crucial.

Casting and molding are among the most popular techniques for making metal and plastic parts. From the auto industry to consumer products, these processes are essential. And here, a mold release agent plays a crucial role. Mold release agent manufacturing is not just a simple mixing process. It involves a step-by-step process of making smooth, durable, and stable releasing agents.

You might be wondering whether making mold release agent is profitable. Also, you might want to learn more about this process in a factory. This guide outlines the overall manufacturing process for mold release agents in a factory.

carbon fiber release agents

Mold Release Agent Manufacturing Process

In mold release agent manufacturing, you have to work with various chemicals, oils, water, and solvents. Handling each material also follows different rules and regulations. To get the best quality outcome, you must know how to handle them correctly.

High Quality Raw Material Selection

In general, there are hundreds of different types of releasing agents. Each of them also has different performance needs. Moreover, they all have different chemical compositions. Therefore, before making the agent, selecting the right raw material is a critical step.

The quality of the final product comes from quality raw materials. If you plan to build such a production line, you must ensure premium quality. This way, you can guarantee your customer better product performance and stability.

A release agent typically consists of three main components. Lubricants reduce the friction and allow smooth demolding. On the other hand, organosilicon compounds improve heat resistance and surface separation. Additives finally improve the stability. All three work together to offer a reliable releasing effect.

Raw Material Inspection & Lab Testing

After you have selected the raw materials, check them to ensure they are ready. Specifically, you have to ensure they meet technical and safety standards. If you ignore this step, the final product may have hidden defects.

In an organized laboratory, like in AMINO, every batch of raw material is tested. Common tests may include purity analysis, viscosity testing, moisture content testing, and compatibility testing. These tests also detect contamination or batch-to-batch variation.

Making the Formula & Raw Material Mixing

The formula design decides the final product type. It is the core technical stage of mold release agent manufacturing. Different applications typically need different formulas. For example, die casting needs high heat resistance. On the other hand, a plastic mold needs a good surface finish. Therefore, the formula must match the mold material and operating conditions.

You must carefully calculate the ratio for each raw material. Even small changes can affect performance.

Once you have confirmed the formula, add the raw materials to the mixing vessel. Later, strictly monitor the mixing speed, temperature, and time.

While mixing the raw material, uniform mixing is also essential. Poor mixing may cause separation or uneven performance. Therefore, modern factories like AMINO utilize modern equipment. We can ensure the highest quality of the blending.

Emulsification

In mold release agent manufacturing, emulsification is a common term used. It mainly mixes things that usually don’t mix. A typical example you may count on is oil and water.

Emulsification typically allows oil-based material to mix evenly with water. This way, the releasing agent becomes more stable and straightforward to use.

For emulsification, you can use either high-speed mixers or a high-shear machine. They break the oil into tiny pieces. Later, adding the surfactants and emulsifiers ensures the bits remain evenly distributed. Throughout this whole process, keep an eye on the temperature and working time.

During this step, other chemical processes can also occur. Eventually, the reaction strengthens the bonding and makes the film more stable.

Important: You need to keep a close eye on the entire reaction. Lack of control can lead to separation or reduced effectiveness.

amino factory

Finished Product Sampling and Quality Testing

After the production, the testing phase starts. This step is necessary to ensure your product meets the performance requirements.

You can take small amounts from each batch and test them for color, texture, pH, stability, and release rate. Check the heat resistance and dust levels to get the best quality. The settings in these tests are like those in real production.

You can also run long-term tests to verify that your product remains stable. At AMINO, only products that pass all tests are approved for sale. If any issue is found, the batch is adjusted or reprocessed.

Real-World Application & Verification

Before packaging, AMINO also conducts practical testing. This step typically connects laboratory results with real-world use. In this stage, you can verify whether your product is ready for real-world use.

You can apply the mold release agent to actual molds. You can choose from various methods, like spraying, brushing, or wiping. To learn more about the differences between spray and wax types, you can read the article “Mold release spray vs Mold Release wax.

Before packaging, AMINO prepares the necessary certifications for the product. These certificates and test results are sent to the customer with the product.

amino factory

Packaging and Storage

The last and final step in the process is packaging, sealing, and storage. Using the right packaging and labeling ensures your product reaches your customers safely. The packaging labels must include the required compliance texts.

At AMINO, we use clean, sturdy packaging. Most products go into IBC tanks, metal cans, and plastic drums. Each jar is tightly sealed and labeled.

It is also important to store the mold release agent correctly. It needs to be kept somewhere cool and dry. Too much heat and direct sunlight may hurt the quality.

amino factory

Contact Us Today!

Making a releasing agent is not just mixing things. It requires careful handling throughout the process. You must make sure you are choosing the right material, mixing at the right speed, and choosing the right emulsifier.

If you want to buy the mold release agent from a reputable company, AMINO might be a great choice. For more information, feel free to get in touch with our customer service team.

amino mold release agent manufacturer

The post Mold Release Agent Manufacturing Process appeared first on AMINO.

]]>
How to Clean Epoxy Resin and Prevent It from Sticking to Molds? https://aminoreleaseagent.com/blog/how-to-clean-epoxy-resin-and-prevent-it-from-sticking-to-molds/ Sun, 04 Jan 2026 01:42:28 +0000 https://aminoreleaseagent.com/?p=4030 Epoxy resin is widely used in molded products across various industries. From electronics to automotive, aerospace, and industrial equipment, all need epoxy resin products. Thanks to its excellent mechanical strength. Besides, its chemical resistance, dimensional stability, and strong bonding make it ideal for molding applications. However, despite its many advantages, epoxy resin also comes with [...]

The post How to Clean Epoxy Resin and Prevent It from Sticking to Molds? appeared first on AMINO.

]]>
Epoxy resin is widely used in molded products across various industries. From electronics to automotive, aerospace, and industrial equipment, all need epoxy resin products. Thanks to its excellent mechanical strength. Besides, its chemical resistance, dimensional stability, and strong bonding make it ideal for molding applications.

However, despite its many advantages, epoxy resin also comes with some limitations. One of the most common challenges in molding is the tendency for resin to stick to the mold surfaces. This sticking issue may affect part quality and slow down your production. If you don’t handle it properly, it may even shorten the mold service life.

This article will teach you how to clean epoxy resin from molds. It will also guide you on some measures to prevent epoxy resin from sticking in the future.

Overview of Epoxy Resin Products

Epoxy resin is a versatile material used in a wide range of industries. Its multiple properties are the main reason behind widespread applications. Typically, epoxy resins come in two-part systems. The system includes a liquid resin and a hardener. You have to mix these two components to initiate curing and form a strong, solid material.

Additionally, specialized epoxy resins are formulated for specific uses. For example, coating resins are made for thin-layer surface making. Casting resins, on the other hand, work well for deep applications and thick molds. For repair and gap filling, you may use epoxy putties. It is one of the best solutions for repair work.

Moreover, there are some other specially designed epoxy resins for specific uses. Examples include marine, industrial, and UV-resistant epoxies. Marine epoxy is used to resist salt or water for boat repair works. Industrial epoxies are used to withstand harsh chemical reactions. And UV epoxy prevents yellowing from sunlight.

Therefore, epoxy resins are used in almost all sectors. From construction sectors and flooring systems to sensitive PCB boards or structural bonding, you can use it everywhere. It is also very common in consumer goods, such as Jewelry, crafts, furniture, and tabletops.

epoxy carbon fiber part

Understanding Epoxy Resin Behavior in Molds

Generally, epoxy resins work through chemical reactions. When you apply the resin to the mold surface, the chemical reaction known as polymerization begins. This process helps to transform the mixture from liquid to solid. When the resin cures, it generates heat. The heat mainly comes from the exothermic reaction. When applied to thicker molds, it may heat up rapidly, leading to cracks or damage.

The resin also shrinks as it hardens. It occurs because the molecules pack tightly during curing. When the liquid thickens in a deep mold, air bubbles can get trapped. To minimize the trapped air bubbles, choose a slow-curing resin. After chemical bonding, the reaction finishes and solidifies the layer.

Common Problems Caused by Epoxy Resin Build-Up

If not handled properly, epoxy residue tends to stick to the mold surface. And gradually, it builds up over time. This residue may seem minor at first, but it can quickly affect the quality of the molded parts. As the build-up increases, several issues begin to appear. The three most common problems are outlined below.

industrial epoxy composite tubes

Poor Surface Finish

One of the most common epoxy resin build-up issues is showing poor surface finishing. You may often see an uneven surface layer on the mold walls. This extra residue sometimes acts like a imprint on the mold. Every tiny bump on the mold will transfer to the resin. As a result, the final surface appears duller and cloudier. You will lose the glossy, shiny finish for which epoxy resin is known.

In some areas, roughness and wear appear frequently. Furthermore, it becomes rougher and more uneven after curing. In this case, products often require post-processing to smooth their surfaces.

Difficult Demolding

Old resins are typically much stronger, which often works like glue inside the mold. Usually, it creates a strong bond between the mold and the new pour. You need to apply extra force to get the latest piece out. This force may cause damage or wear to the silicone mold. Also, it can damage the chipped resin edge.

As time passes, the build-up fills the mold’s tiny features. Thus, the resin gets stuck in that cleft. To pry them off, you may need small mechanical tools, which often crack the mold’s surface. It makes demolding difficult.

More Downtime and Cleaning Costs

So, you know what happens if you don’t clean up the epoxy build-ups. If you didn’t follow the proper procedure for handling epoxy resin, your mold may need frequent cleaning. This cleaning process often halts production and is time-consuming as well. You may have to spend hours doing it.

The production process also slows down and wastes your time. Sometimes people use chemical elements to clean surfaces. It may be costly for hobbyists.

On the contrary, replacing these molds is also expensive. Such build-up molds cannot be repaired easily. So, you will have to buy new ones.

How to Clean Epoxy Resin from the Mold

Cleaning the epoxy resin from the mold should be done promptly. And, of course, you must do it the right way. Delayed or improper cleaning prevents the resin from curing fully. As a result, it makes the removal much more difficult and increases the risk of mold damage. The recommended cleaning process consists of three stages.

Stage #1 Preparatory Cleaning

The first stage of cleaning starts with preparatory tasks. Although this stage is optional, it is the best practice for optimal cleaning.

In this stage, you will mainly check for debris, contaminants, or other stuff. The goal is to make the main cleaning easier.

Stage #2 Main Cleaning

Once you have removed all the debris, the main cleaning phase begins. You may need to use chemical solvents to break down resins. Use a clean, damp cloth mixed with 91% isopropyl alcohol. Now, rub it firmly onto the surface and dissolve the sticky film. Use a cotton swab for tight corners immersed with alcohol. Continue the process until the surface no longer feels sticky.

In case the resin starts to thicken, you can use special resin cleaners. Apply the resin cleaner and keep it for a while. It softens the bond between the mold and resin. Now you can easily wipe it off with a paper towel and ensure the surface is completely chemical-free.

Stage #3 Secondary Cleaning

Secondary cleaning is also considered optional. It mainly ensures no stubborn residue is left on the mold.

Use a small amount of warm water with mild soap to wash the mold. It removes any leftover solvents from the surface. Thereafter, gently scrub the surface with a soft sponge. Rinse thoroughly under running water.

Afterwards, dry the mold with compressed air. Don’t let it air-dry, as this could cause water spots to appear. Inspect the mold again in bright light for any remaining leftovers. If everything is okay, store it in a dust-free container. The mold is now ready for your next project.

How to Prevent Epoxy Resin from Sticking to the Mold

Cleaning the mold alone can’t fully resolve epoxy-sticking issues. Without proper prevention, the same problems will continue to appear. To achieve the desired result, you must take proactive measures in advance. In this case, there are three effective ways to prevent epoxy resin from sticking to the mold. Among them, applying the mold release agent is a must.

Apply the Epoxy Mold Release Agent

An epoxy mold release agent is a specialized chemical used to facilitate the release of molded parts. They form a chemical and physical layer between the resin and mold. It’s like a barrier between those two parts. These agents are available in a wide range of options, including sprays, liquids, and waxes. Without it, the resins might bond to solid molds, causing damage during extraction.

release agent for epoxy resin

The release agent works by forming a non-reactive film that also lowers surface energy. When you apply it to the mold, it fills the tiny gaps and creates a smooth, uniform layer. It prevents resins from filling gaps. When resin cures, it can be easily removed from the mold without applying additional force.

Generally, you can find two significant types of epoxy mold release agents: water-based and solvent-based. Each has its unique benefits and applications.

#1 Water-Based Epoxy Mold Release Agent

water-based release agent uses water as their primary carrier. These agents are eco-friendly and free of harsh chemicals or other toxic elements. Such features make them reliable for use in small workshops or in schools. Water-based agents are also known for their non-flammable property. They are far safer and easier to store. Most people prefer them because they are less harmful to health.

#2 Solvent-Based Epoxy Mold Release Agent

Solvent-based release agents use various chemical elements as their primary carrier. Generally, they utilize different types of hydrocarbons and alcohol. These agents can dry much faster and can form thin layers easily. They allow you to pour material almost instantly, and the thin films are highly durable, lasting for a few cycles. They are also effective at preventing sticking in high-heat conditions. Their primary purpose is to capture every tiny detail of the mold.

Optimize Mold Surface Condition

To optimize the mold, you have to follow strict protocols. Always keep the mold clean and smooth. Remove dust, grease, or old resins regularly before use. Polish the mold if necessary and avoid scratches and damage. You can use a soft cloth for this work. A clean, functional mold is always essential for an optimal outcome.

Control the Molding Process Parameters

When starting the process, monitor the temperature of your workstation. Avoid overheating, as it can cause extreme adhesiveness of resins. Mix epoxy in accurate ratios. Pour the resin slowly into the mold to avoid air gaps. Control the curing time and environment. Remember, a stable process prevents clinging and facilitates the demolding.

Summary

Epoxy resin tends to stick to the mold surface, which makes the production process more difficult. However, it is excellent material for a wide range of products. With the right techniques, you can overcome difficult situations.

Cleaning epoxy resin from the mold surface is generally done in three stages. Follow all these guides step by step to ensure you are fully ready for final production. Cleaning the mold is not all. You must ensure that, in the future, the epoxy resin build is significantly reduced. To do this, you can optimize the mold surface. Or you can control the molding process. However, the best practice is to apply epoxy mold release agents.

AMINO is a leading manufacturer of a wide range of mold release agents. One of their main products includes epoxy resin mold release agent. If you have any questions, feel free to reach out to us.

The post How to Clean Epoxy Resin and Prevent It from Sticking to Molds? appeared first on AMINO.

]]>